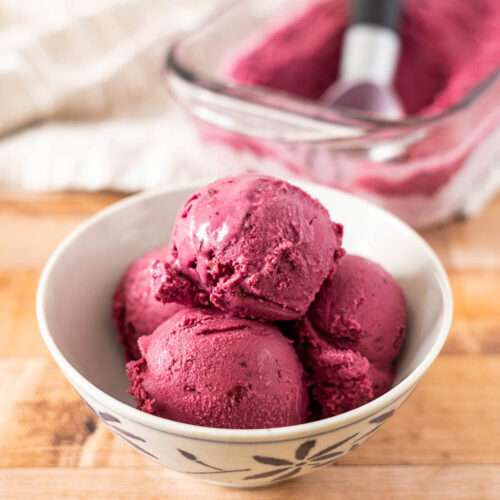
Dairy Free Huckleberry Ice Cream (Egg Free)
Dairy free huckleberry ice cream is a delicious way to use fresh huckleberries in an allergy friendly summer treat! Our recipe is also egg free, but it's still smooth and creamy. If you don't have access to Western huckleberries, you can use wild blueberries in this ice cream.Makes 1 quart of ice cream mix, about 1 ¼ to 1 ½ quarts of ice creamDairy free, vegan, gluten free
Servings 10 servings
Calories 182kcal
Equipment
Ingredients
- 1 ½ cups fresh picked through huckleberries*
- ¾ cup sugar
- 2 tablespoons water
- 2 teaspoons lemon juice
- 2 ⅓ cup coconut milk room temperature
- 1 tablespoon + 2 teaspoons cornstarch make slurry with some of the coconut milk
- dash salt
- 2 teaspoons vanilla extract
Instructions
- Wash and pick through your huckleberries, removing any stems and bad berries. Measure out 1 ½ cups of huckleberries and add them to a 2-quart saucepan.
- Add the sugar, water, fresh lemon juice, and dash of salt to the saucepan with the huckleberries and heat over medium heat, stirring regularly, until it begins to simmer. We are essentially creating a huckleberry sauce before we add our coconut milk for the ice cream.
- Once it begins to simmer, lower the heat to medium-low and simmer for 8 minutes, stirring regularly.
- Add 2 cups of the room temperature coconut milk to the huckleberry sauce in the pan, putting the remaining 1/3 cup of coconut milk in a small bowl for our cornstarch slurry.
- Whisk the cornstarch into the coconut milk in the small bowl and whisk this into the pan with the coconut milk/huckleberry mix and continue to heat and whisk for several minutes as the mixture begins to thicken slightly. This will thicken but it won’t be as thick as our homemade puddings since there is less cornstarch.
- Remove from the heat and stir in the vanilla extract. You should have about 1 quart of huckleberry ice cream liquid.
- From here, you can either put this in the fridge to completely cool for several hours before churning, or you can use an ice bath to quickly cool the huckleberry ice cream mixture for churning. I used the ice bath method for ours and it took about 30 minutes to chill for churning.
- For the faster cooling of an ice bath: pick 2 bowls, one medium-sized bowl that fits into a larger bowl. In the large bowl, fill it about 1/3 full of ice and add some cold water. Set the smaller bowl inside the larger bowl with the ice, and add the ice cream mixture into the smaller bowl and stir regularly for even cooling. It helps if the smaller bowl is metal since it conducts the cool temps to the ice cream mix faster.
- Stir the ice cream mix regularly in the ice bath to cool it down. It will thicken a bit more as it cools.
- Once it’s chilled enough (it just needs to feel cool or cold to the touch), add it to your running ice cream machine (if using a freezer container type ice cream maker, turn on the machine first) and run the ice cream machine for about 25 to 30 minutes. I have the Cuisinart Gelataria and I used the ice cream setting for 25 minutes.
- Serve the ice cream immediately if you like, or add it to a covered container and freeze to scoop later. You can serve this with chocolate sauce on top or our homemade huckleberry sauce (I’ll be adding a recipe soon for that!).
- You can top this with chocolate sauce, huckleberry sauce (I'll be posting a recipe for that soon), or crumbled lemon sandwich cookies.
Notes
*If you want to give this recipe a try but don't have access to fresh huckleberries, you can use wild blueberries instead. Wild blueberries are small and flavorful and would make a good sub here since they are related to mountain/western huckleberries. Most wild blueberries are frozen, so you can thaw, drain, and then measure out the wild blueberries for this recipe. OR you can use pre-made huckleberry syrup, jam, or sauce in this recipe.
Nutrition
Serving: 0.5cup | Calories: 182kcal | Carbohydrates: 21g | Protein: 1g | Fat: 11g | Saturated Fat: 10g | Polyunsaturated Fat: 0.2g | Monounsaturated Fat: 0.5g | Sodium: 8mg | Potassium: 136mg | Fiber: 1g | Sugar: 17g | Vitamin A: 12IU | Vitamin C: 3mg | Calcium: 11mg | Iron: 2mg
