Our gluten free cherry crisp is a delicious way to use fresh, in-season cherries! The cherry filling also works great for pies, cheesecakes, ice cream, and more. This recipe is dairy free and peanut free as well.
Disclosure: this post contains affiliate links
One of my favorite thing about summer is the fresh cherries that are so abundant in grocery stores this time of year!
If you are part of a food co-op or love to visit farm stands and seasonal fruit trucks, you may end up with a ton of sweet cherries. Our cherry crisp recipe is a great way to use up fresh and in-season cherries!
Food allergy notes:
- Gluten free
- Dairy free
- Egg free and vegan
- Peanut free
Why you’ll love this recipe
Our cherry pie filling for this crisp recipe is made with really simple ingredients you likely already have in your kitchen, plus it’s actually pretty easy to make!
I love fruit crisps since they come together much more quickly than pies, you don’t have to worry about making a pie crust if you want a faster dessert.
The great thing about this cherry filling is that you can use it in many different recipes, not just for crisp. You can use it in pies, over cheesecakes, on ice cream, and more.

How to make gluten free cherry crisp
Here are the steps for making homemade gluten free cherry crisp with fresh cherries. This is just an overview of steps, the full recipe card is at the bottom of the post!
Making the cherry pie filling from fresh cherries
- Wash and stem your cherries (you’ll need about 1.5 to 2 pounds of fresh cherries for this recipe).
- Use a 6-cherry pitter and remove the pits from your cherries, and then cut them in half. You’ll need 4 cups of pitted and halved cherries.
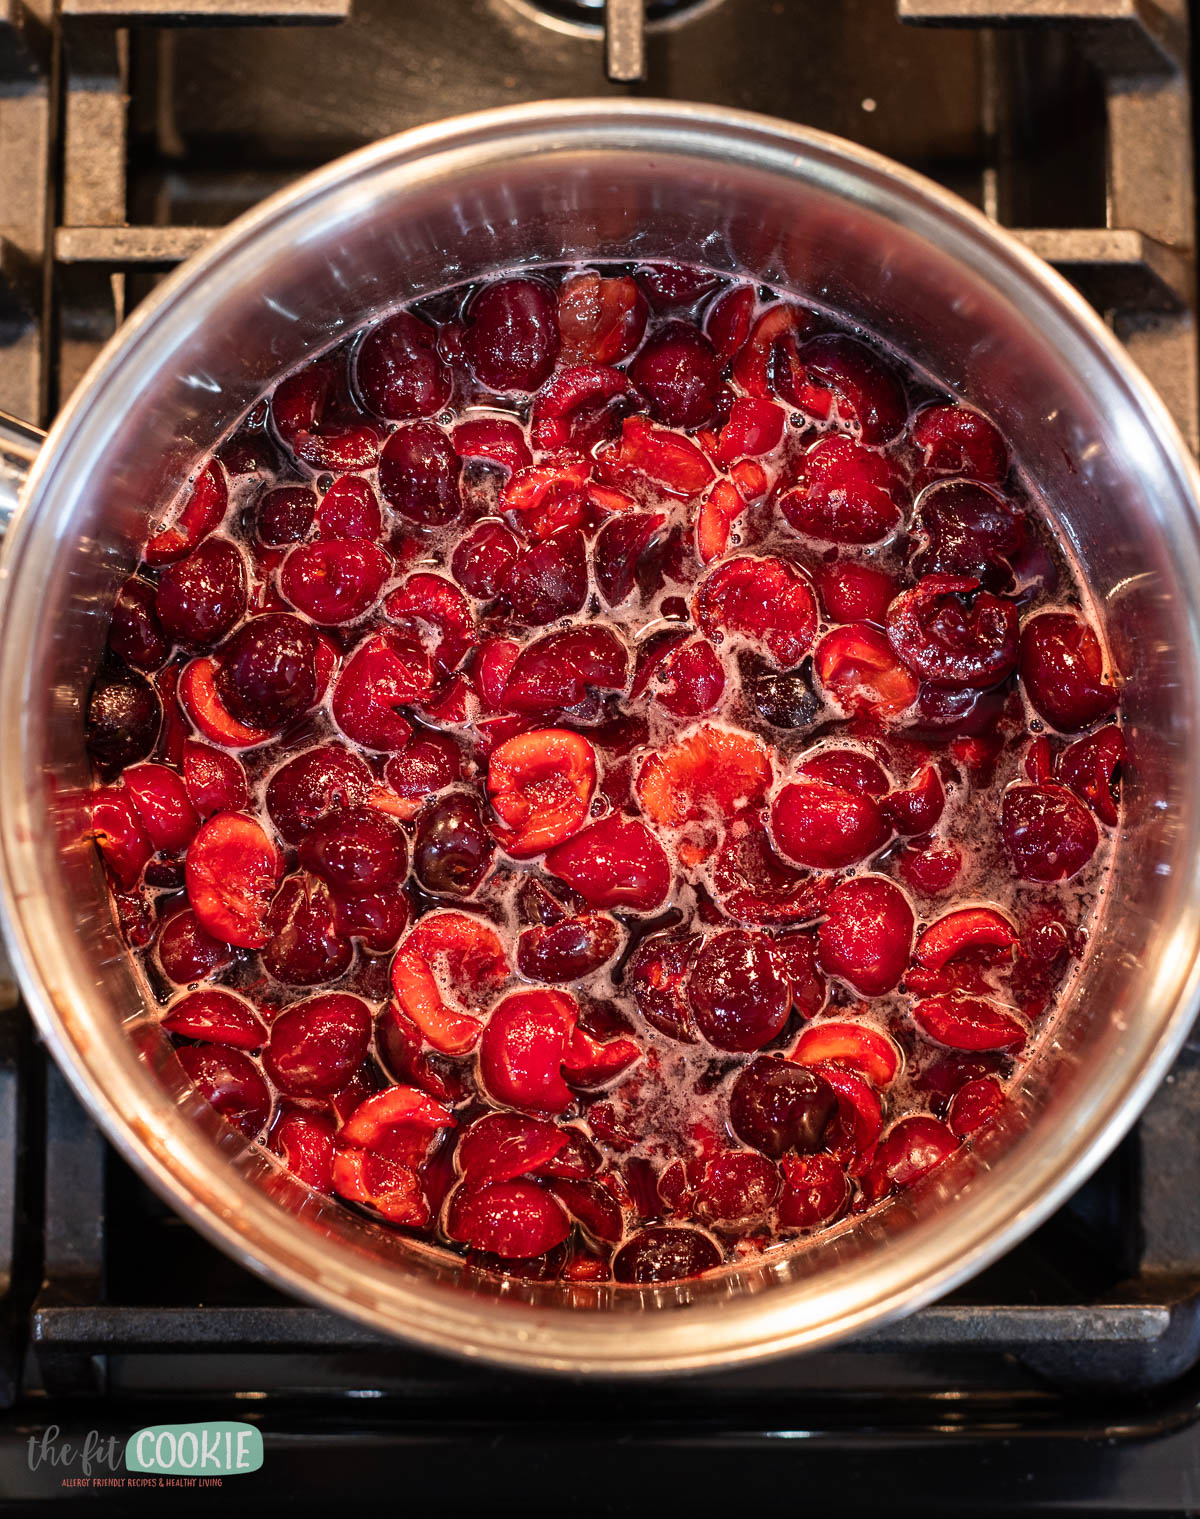
- Add the cherries to a 2-quart saucepan along with the sugar, water, lemon juice, and a dash of salt and stir.
- The amount of lemon juice will depend on your personal taste preference and how tart your cherries are. If your cherries are darker and sweeter, use 3 Tablespoons lemon juice. If they are more tart, you can use 1-2 Tablespoons of lemon juice.
- Bring the cherries to a simmer over medium heat, then lower the heat slightly to medium-low and simmer for about 6-8 minutes to soften the fruit and release the fruit juices, but the fruit still holds it’s shape (it doesn’t get mushy). Stir regularly.
- Scoop out some of the hot cherry juice (about 1/4 cup) into a small bowl and whisk in the cornstarch to make a cornstarch slurry. Return this back to the simmering cherries and stir as you slowly pour the slurry into the cherries.
- Continue to cook for another 1 to 2 minutes to thicken the cherry filling, stirring constantly to prevent lumps and scorching.
- Remove from the heat and cool for about 15 minutes or so before assembling and cooking your crisp.


From here, you can actually use this cherry pie filling for real pie if you have a favorite allergy-friendly crust, or you can use this filling once it’s fully cooled in our layered cherry cheesecake cups.
Just an FYI I tried this pie filling in the Wholly Gluten Free crust and for some reason it didn’t turn out well in that crust. The crust ended up getting super hard on the bottom. This would probably work well in other pie crusts, but it didn’t seem to work in the one I tried.
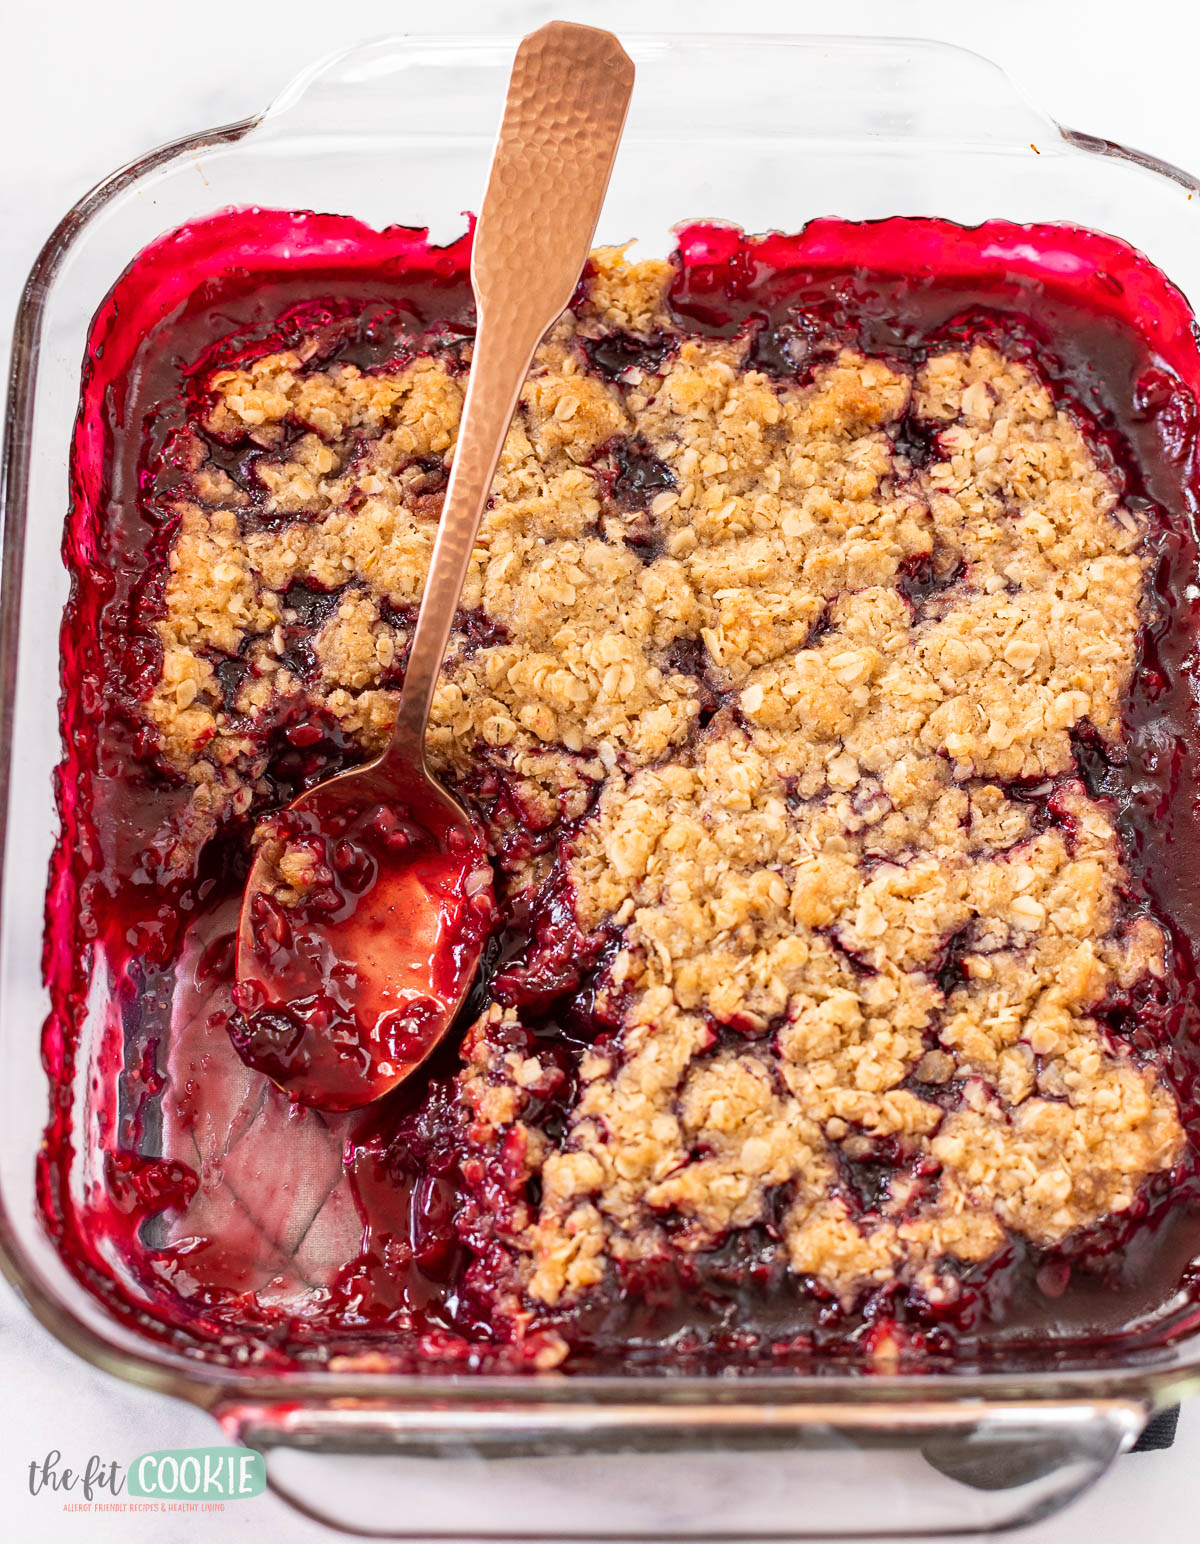
Assembling and cooking the cherry crisp
Once your cherry filling is made and cooled slightly, you can assemble the crisp and bake it.
- Preheat the oven to 350 degrees F (176 degrees C).
- Add the cherry pie filling to an 8×8-inch glass baking dish and set aside.
- In a medium bowl, melt the dairy free butter and stir in the gluten free quick oats, brown sugar, gluten free baking mix, and vanilla, and stir until it’s mixed and it’s crumbly looking.
- Sprinkle this over the cherry pie filling evenly and the bake for 30 minutes.
- Remove from the oven and allow to cool for at least 30 minutes before serving.
- Store any leftovers in an airtight container at room temperature for 2 days or in the fridge for up to 3 days.
- This is delicious served with dairy free whipped cream (we like So Delicious Cocowhip) or dairy free ice cream!


Check out our other gluten free crisp recipes!
Gluten Free Vegan Cherry Crisp (made with fresh cherries)
Ingredients
Cherry pie filling
- 4 cups pitted and halved fresh sweet cherries (Bing cherries) (about 1 ½ to 2 pounds of fresh cherries)
- ½ cup unbleached cane sugar
- ½ cup water
- 2-3 Tablespoons fresh lemon juice*
- Dash salt
- 2 Tablespoons + 1 teaspoon cornstarch
Crumb topping
- ¼ cup dairy free butter, melted
- ½ cup gluten free quick oats
- ¼ cup King Arthur Flour all purpose baking mix
- ⅓ cup packed brown sugar
- 1 teaspoon vanilla extract
Instructions
Cherry pie filling
- Wash your cherries, remove the stems, and pit them. I use the OXO multi cherry pitter to make this faster.
- Cut the pitted cherries in half and measure out 4 cups of pitted and halved cherries.
- Add the cherries to a saucepan with the sugar, water, lemon juice, and dash of salt.
- Stir together and bring to a simmer over medium-low heat.
- Simmer for about 5-8 minutes until the cherries start to soften and the liquid increases, but the cherries aren't mushy. Scoop out some of the hot cherry juice (about 1/4 cup) into a small bowl and whisk in the cornstarch and return it back to the pan, stirring as you add it to the pan.
- Cook for an additional 2 minutes or so to thicken the cherry pie filling, stirring constantly to prevent scorching.
- Turn off the heat and set aside for about 15 minutes to cool a bit, it will continue to thicken as it cools.
- Preheat the oven to 350 degrees F.
- In a medium bowl, melt the dairy free butter and stir in the quick oats, the baking mix, the brown sugar, and the vanilla.
- Add the cherry pie filling to an 8×8-inch square baking pan (I like glass pans) and top with the oat/crumb topping.
- Bake for 30 minutes.
- Allow to cool completely before serving.
Notes
Nutrition
Pin for later!


Sarah Jane Parker is the founder, recipe creator, and photographer behind The Fit Cookie. She’s a food allergy mom and allergy friendly food blogger of 12 years based in Wyoming. Sarah is also an ACSM Certified Personal Trainer, ACE Certified Health Coach, Revolution Running certified running coach, and an ACE Certified Fitness Nutrition Specialist
Is this recipe for sweet cherries (that you eat fresh), or tart cherries (usually only used in pies)? I have some frozen tart cherries that I wanted to make a cherry crisp from for a picnic.
This recipe is made with sweet cherries that you can buy fresh for eating, I went ahead and updated the recipe card to specify which ones. You could probably use the tart cherries and adjust the amount of sugar and lemon juice depending on how tart your frozen cherries are.