DIY your fall decor with these fun to make Borax Crystal Pumpkins! These beautiful crystal pumpkins can be decorated a variety of ways and make great gifts as well. This project only requires a few items to make and requires minimal hands-on time.
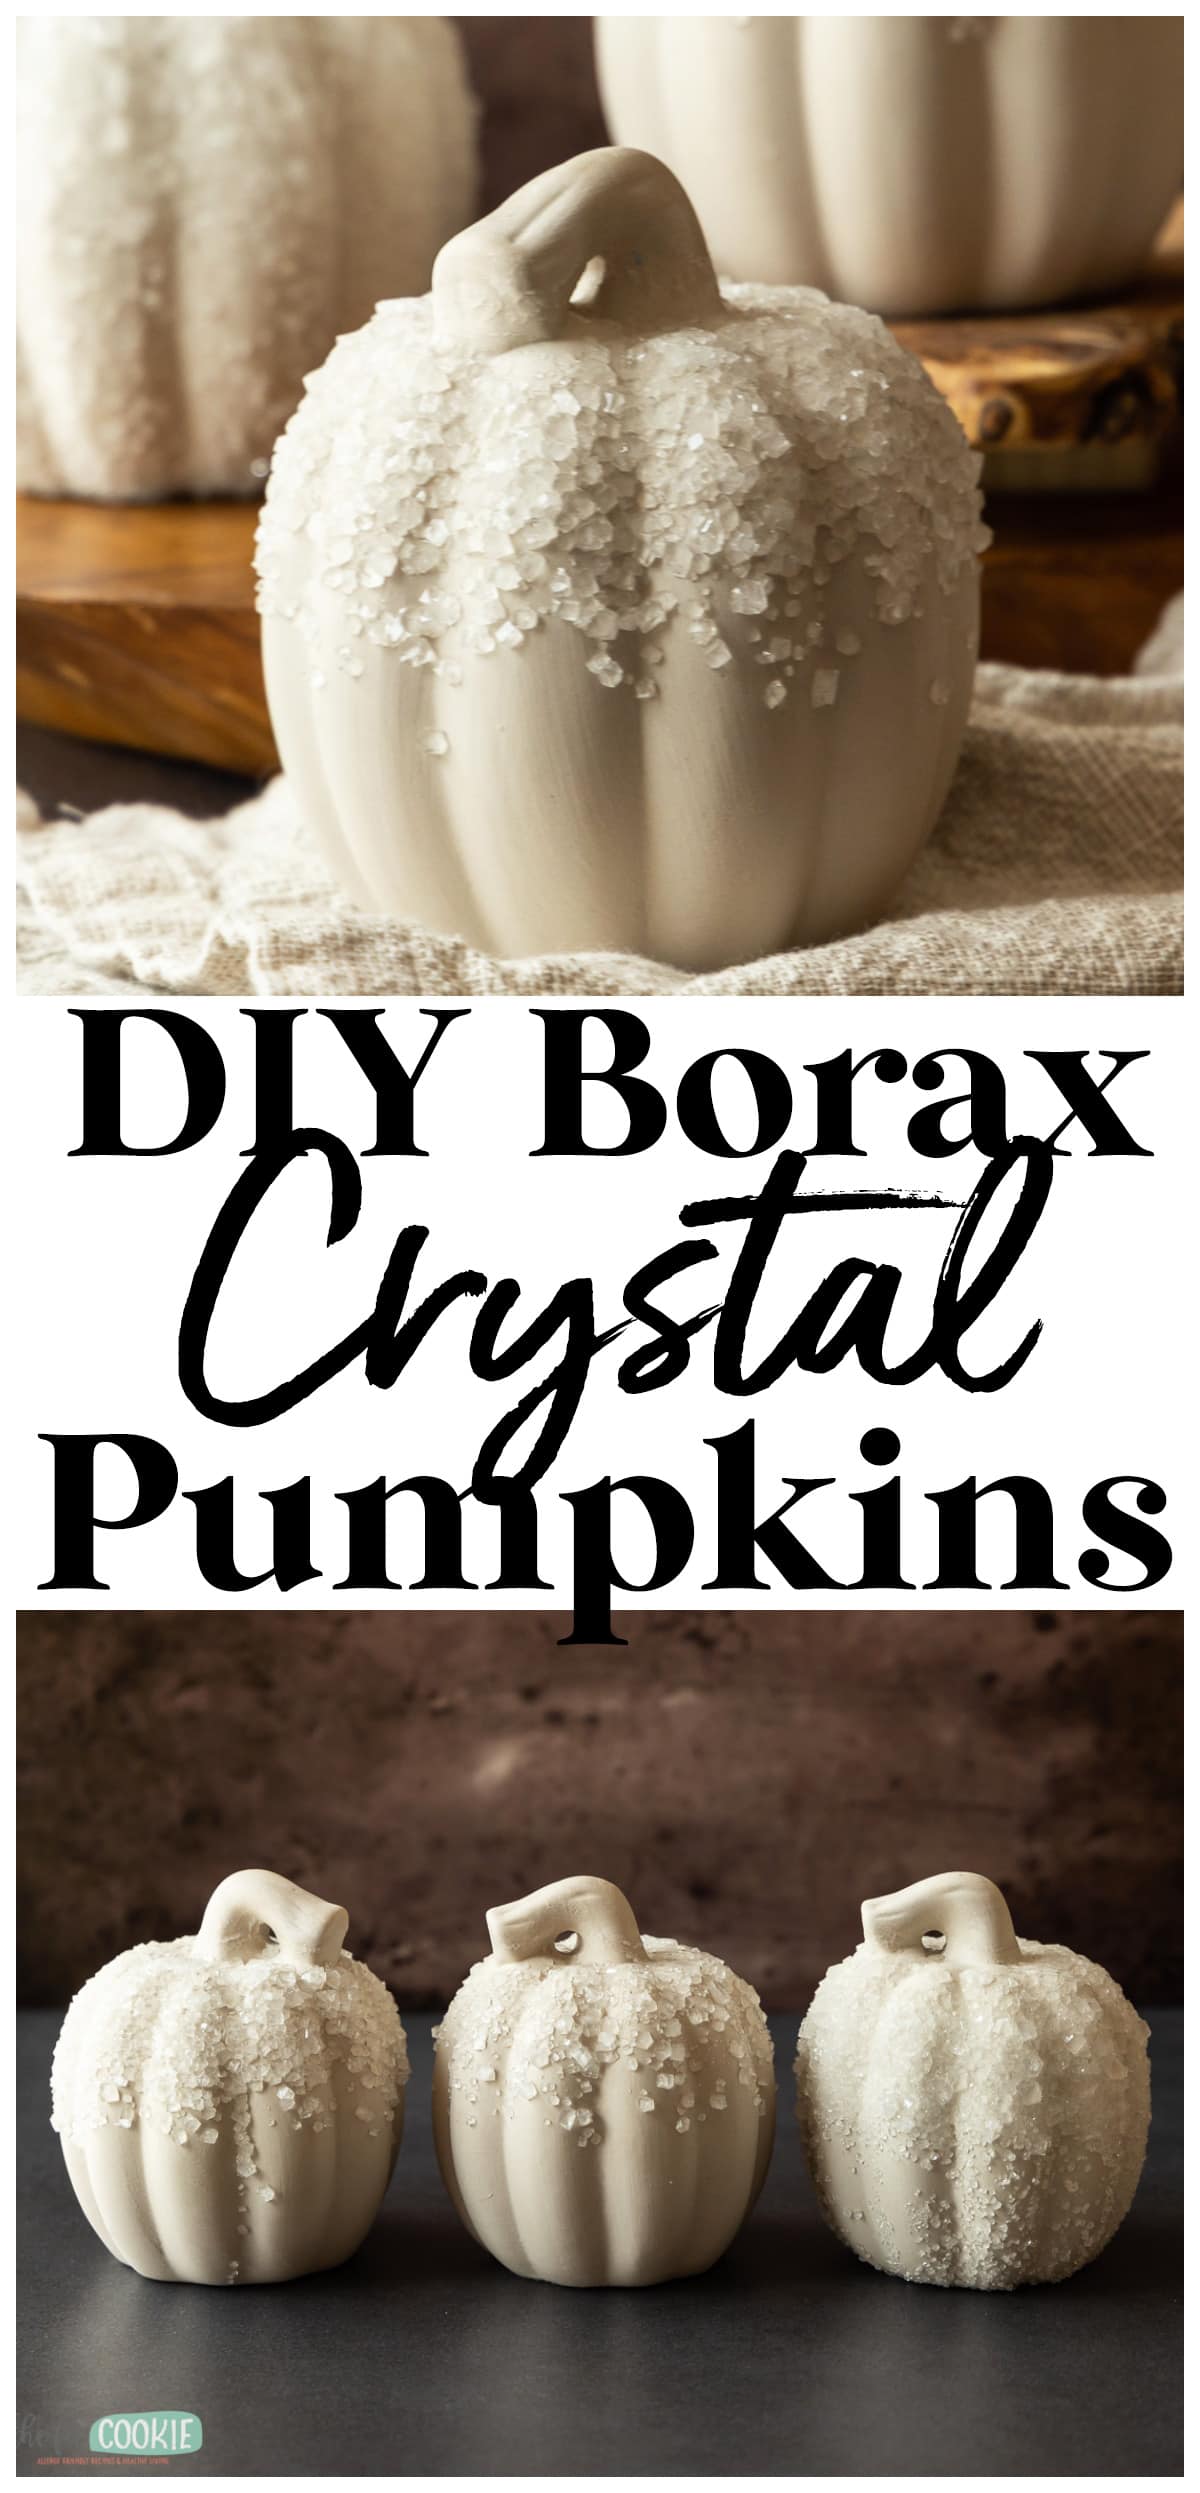
If you love fall decor and want to do a fun DIY project that doubles as a science experiment, I can’t wait to show you how to make borax crystal pumpkins!
You may have made borax crystals with pipe cleaners before, if so you’ll know how this works. But pipe cleaners don’t hold up very well, so we’re making borax crystals without pipe cleaners and using unglazed ceramic instead.
This DIY fall decor project will take at least once day to be fully complete with the soaking time and drying time, so make sure that you have enough time for this. But most of the time is not hands-on, so it’s an easy one to do!
We’ll show you how to get these done, but first a word on safety.
Borax safety
Borax and boric acid are both borate compounds that include the element boron, but borax is naturally occuring and taken from the ground, whereas boric acid is concentrated and processed from borax.
Borax is a natural mineral compound that is mostly safe when used as intended: don’t ingest borax, and try not to inhale it or get it in your eyes when you’re pouring the powder into your pot.
Make sure not to allow kids and pets to be unsupervised around borax as well and limit how much of it you’re getting on your skin. If you notice it irritates your skin, use gloves while handling the powder and solution.
This also involves boiling water, so make sure you use proper precautions when dealing with hot water and supervise children who may be doing this project.
How to make Borax crystal pumpkins
Supplies
For this DIY project you’ll need:
- 2-gallon pot
- 20 cups water (1.25 gallons)
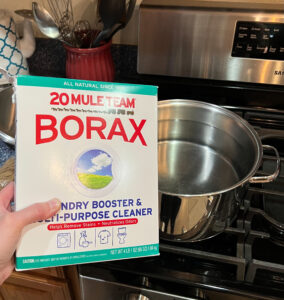
- 3-4 cups borax powder
- Unglazed ceramic pumpkins
- 5 to 24 hours depending on how many crystals you want on your pumpkins.
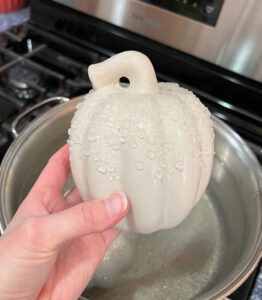
For your ceramic pumpkins, you’ll want to look for unglazed ceramic since the borax crystals will stick more firmly to the rough surface of unglazed ceramic. We tried a few different glazed ceramic and plastic items that did not hold the crystals well.
I bought our ceramic pumpkins from Hobby Lobby and they are 4.5 inches tall and fit nicely in our 2 gallon pot that is about 5 inches tall. But in case they remove that one off the website when the season changes, here are a few on Amazon that will work, too.
- Jack-O-Lantern style ceramic pumpkin
- Large (7-inch) plain ceramic pumpkin
- 3-pack of pumpkins in different sizes
If you want to make smaller pumpkins, you can use a smaller pot and cut the borax solution recipe in half. If you need a different ratio than half, just follow the rough estimate on the 20 Mule Team borax website by using about 3-4 Tablespoons of borax for each cup of water. Our solution is about 3 Tablespoons of borax to 1 cup of water.
You’ll want to make sure that the ceramic pumpkins you pick will fit in your chosen pot. I made sure that the stems of my pumpkins stuck out the water so I didn’t get crystals on the stems, just on the top of the pumpkin body itself.
Steps
This is an overview of the steps for making these pumpkins, the printable DIY card complete with all supplies and steps is at the end of the post!
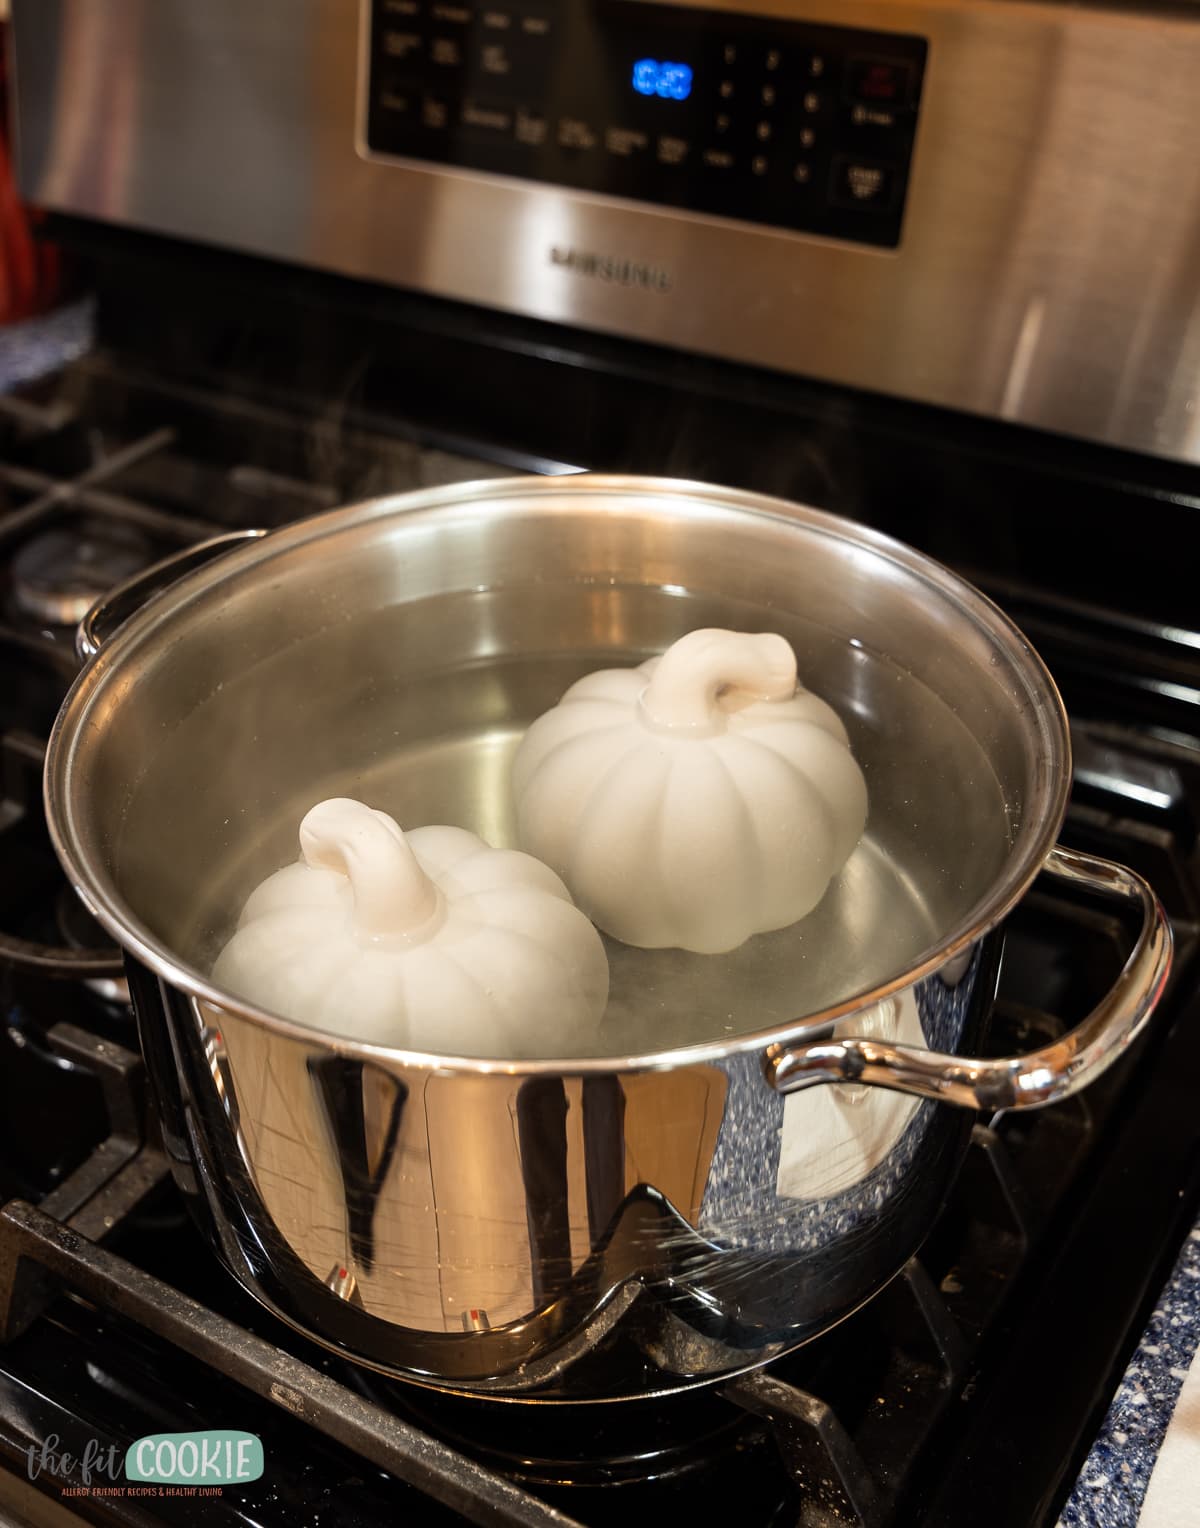
- Add the water to the large pot about 3/4 full, depending on how tall your pumpkins are and how far up the pumpkin you crystals.
- Bring the pot of water to a low boil.
- Once the water is boiling, add the borax to the hot water and stir.
- Leave the heat on until the borax completely dissolves, then turn off the heat.
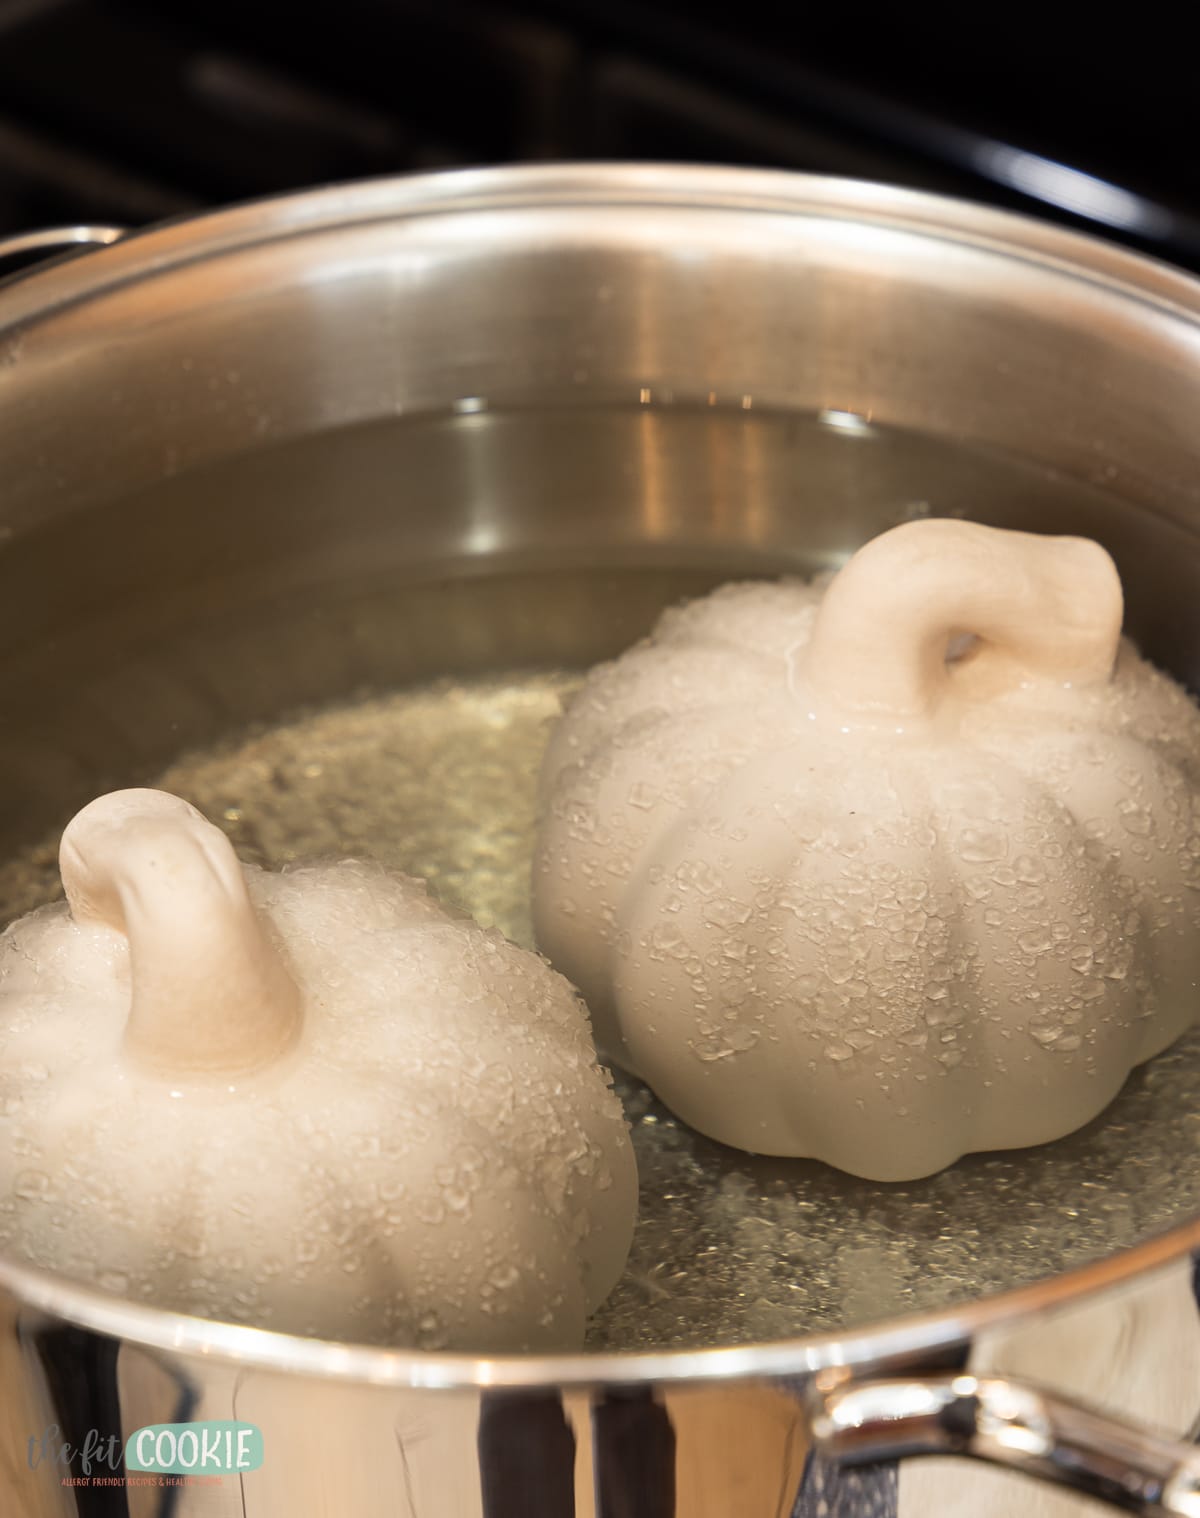
- Add your pumpkin to the pot, making sure to allow the water to fill the inside of the pumpkin before setting it down on the bottom of the pot. This will keep it from floating. Make sure the pumpkins aren’t touching and there is space between them if you’re doing multiples.
- Let the pumpkin sit in the pot for up to 24 hours. I liked how it looked around the 6 to 8 hour mark so we removed them at that time, but if you want lots of bigger crystals, leave it in for up to 24 hours.
- Once the crystals are developed where you like them, remove the pumpkin from the pot and place it on a surface that will allow it to completely dry for about 24 to 48 hours since unglazed ceramic tends to soak up water.
If you don’t see crystals right away don’t worry, it’s still working! You won’t see crystals start to form until the solution is cooled down quite a bit, which takes a while in a large pot. So it will take a couple hours before you begin to see crystals.
If for some reason you don’t like how the crystals turned out and you want to start again, soak the pumpkin in hot/boiling water to dissolve the crystals and you can start the process over again with a new pot of Borax solution.
Notes on creating borax crystals
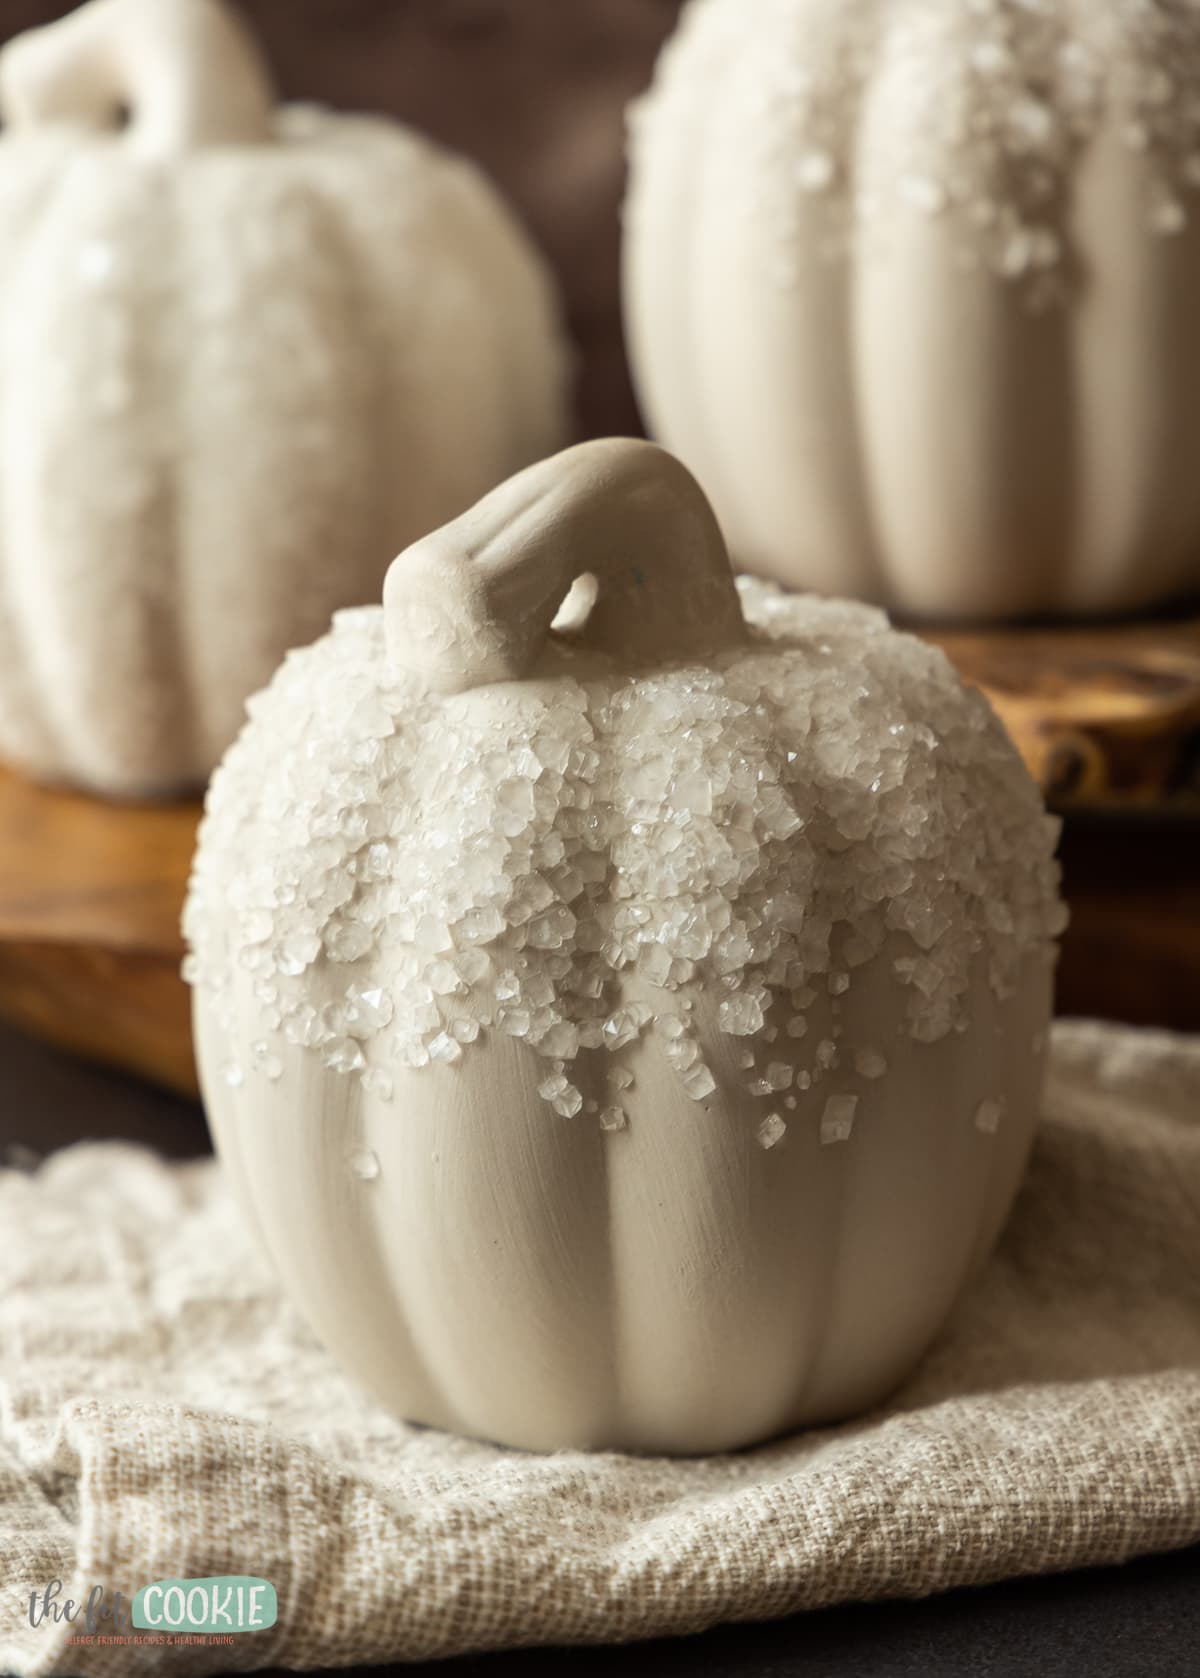
Here is a comparison of our 3 batches of borax crystal pumpkins:
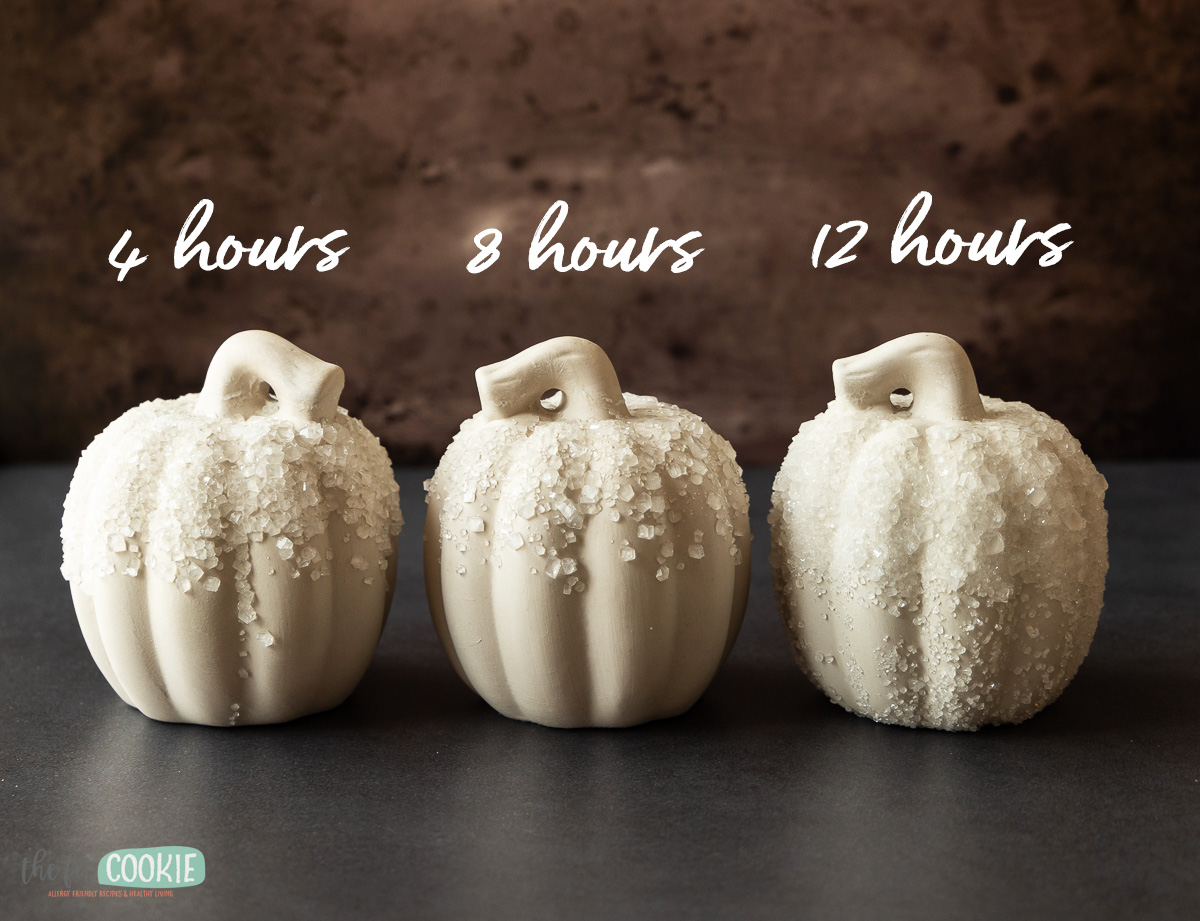
The 4-hour and 8-hour pumpkins don’t look very different because with the 4-hour pumpkin solution, I did not measure the borax so I had a lot more borax in that batch than the 8-hour pumpkin. So if you want crystals faster, you can add more borax than we have listed. You just want to make sure that it all gets dissolved before adding your pumpkins to the pot.
You’ll also notice that the crystals start to form top to bottom, so when you remove the pumpkin earlier it won’t get too many crystals towards the bottom. I loved the way this looked, so I took them out sooner. But if you want crystals towards the bottom, leave it in longer. Just know that the crystals on top will likely be bigger than the ones towards the bottom.
The pumpkin on the far right look a little uneven because I moved the pumpkin at some point while it was sitting in the borax bath and I think it disturbed the crystal formation a bit.
While your pumpkins are sitting in the water bath and getting coated in crystals, the water level in your pot will drop over time due to evaporation. This is completely normal and shouldn’t mess with the crystals at all. It might have flat-ish crystals toward the top.
We also noticed that the unglazed ceramic released a bit of ceramic dust into the water after we put them in. This will temporarily make the water a bit cloudy, but it didn’t seem to affect the crystals. If you want to avoid this, you can rinse the pumpkin in hot water before adding it to the borax water.
What to do with the leftover Borax solution
A few times we made our Borax crystals, we actually reused the solution a few times, adding more Borax to each run as needed. One of my batches I used the solution about 3 times then it wouldn’t make very good crystals after that.
The pot will have crystals coating the bottom and some of the sides of the pot, this is ok and will come off easily once it’s heated again.
To reuse the Borax crystal solution: reheat the pot to boiling again and dissolve a bit more Borax in it to replace the Borax that left with the previous pumpkins (I added about 1/2 to 1 cup or so).
To dispose of the Borax solution: warm up the pot on the stove just enough to loosen the crystals stuck the inside of the pot. Don’t heat it too much or it will completely dissolve them all again and you’ll have to start over. Once the crystals are loose from the side, scoop or strain out the crystals and pour the remaining water down the sink along with hot water in the sink.
I haven’t found any good info on this, but it’s probably not a good idea to pour dissolved and concentrated Borax solution directly down your sink without running some water with it to dilute it.
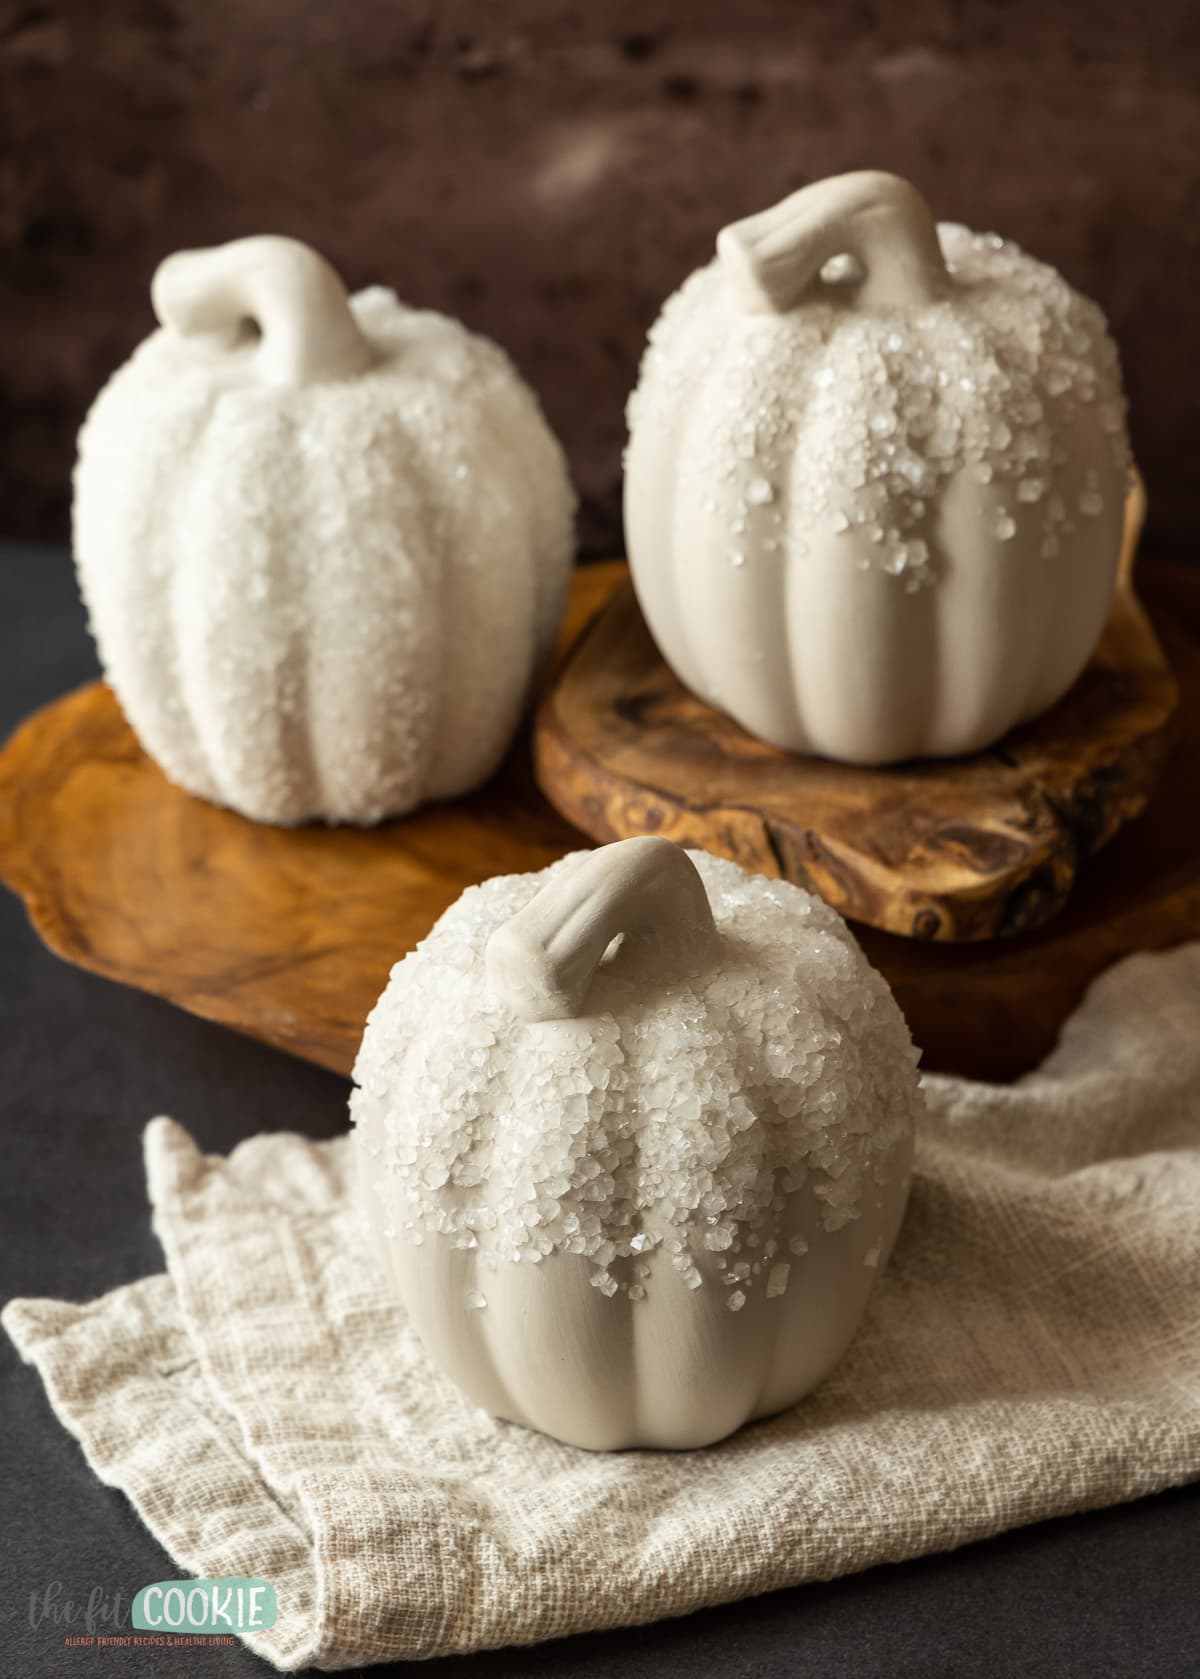
How to decorate the borax crystal pumpkins
Once your crystal pumpkins have completely dried, you can leave it like it is, add some colored or metallic spray paint, or brush on some colored mica powder and spray a clear coat paint over it.
I experimented with some of our copper colored mica powder on a different Borax crystal project and I liked it, but decided to leave our pumpkins uncolored and without any clear coat paint since they look really elegant that way.
If you want to make your borax crystals last longer and make them easier to clean, spraying the clear coat of paint on top of everything should help make it last longer.
If you’re looking for another great pumpkin DIY, check out our pumpkin fairy house tutorial!
Borax Crystal Pumpkins
Equipment and materials
- 2 gallon pot
- 1.25 gallons (20 cups) water
- 3-4 cups borax powder
- Unglazed ceramic pumpkins
Instructions
Borax crystal pumpkins:
- Fill a large 2 gallon pot with water to about 3/4 full.Bring the water to a boil, add the borax to the hot water and stir until it's all dissolved.

- Turn off the heat and add your ceramic pumpkin to the pot, allowing the water to go inside the pumpkin to prevent it from floating.

- If you are doing multiple pumpkins, make sure that they are spaced apart from each other and from the sides of the pot. The crystals won't form properly on them if they are touching each other or the pot.

- Allow the pumpkin(s) to soak for at least 6 hours and up to 24 hours. The longer you let them soak in the borax solution, there will be more crystals and they will be bigger in size.

- Once the pumpkins are covered in crystals to your preference, remove them from the borax water and allow them to completely dry (it may take 1-2 days since unglazed ceramic tends to soak up water).

- Once they are completely dried, you can leave these just as they are, add colored or metallic paint, or spray a clear coat of paint on as a protectant.


What to do with the borax solution:
- To reuse the Borax crystal solution: reheat the pot to boiling again and dissolve a bit more Borax in it to replace the Borax that left with the previous pumpkins (I added about 1/2 to 1 cup or so). To dispose of the Borax solution: warm up the pot on the stove just enough to loosen the crystals stuck the inside of the pot. Don't heat it too much or it will completely dissolve them all again and you'll have to start over. Once the crystals are loose from the side and bottom, scoop or strain out the crystals and pour the remaining water down the sink along with hot water. I haven't found any good info on this, but it's probably not a good idea to pour dissolved and concentrated Borax solution directly down your sink.


Video

Sarah Jane Parker is the founder, recipe creator, and photographer behind The Fit Cookie which she founded in 2011. Sarah is based in Wyoming and has been managing food allergies for herself and her 2 children for over 20 years. Sarah was also a certified personal trainer for 12 years, as well as a group fitness instructor, health coach, running coach, and fitness nutrition specialist.