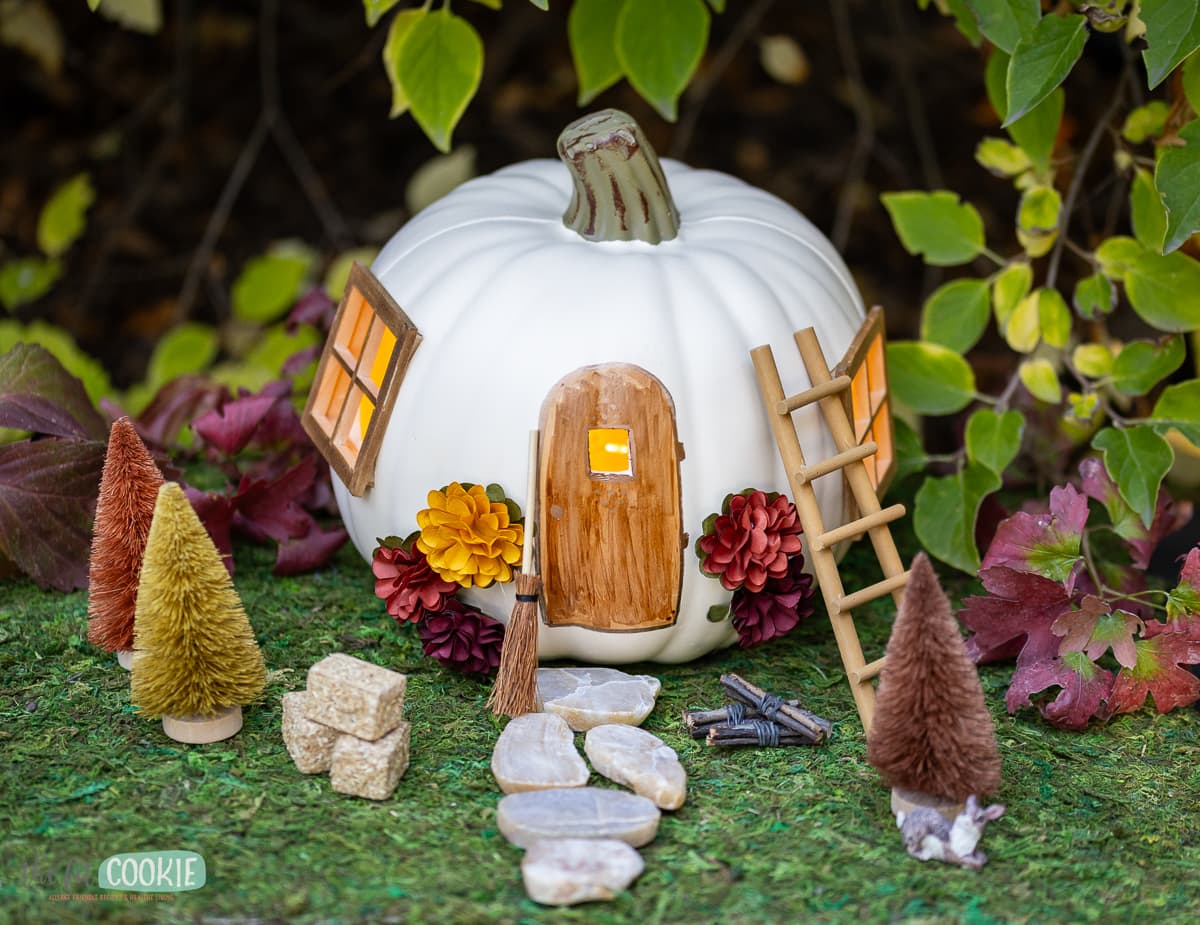
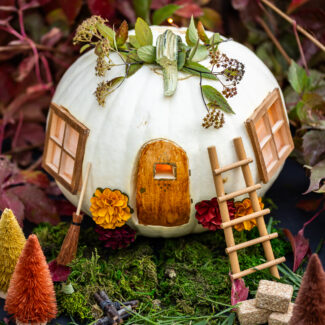
Looking for a fun and unique way to decorate your fall pumpkins? Make a pumpkin fairy house! Our step-by-step instructions show you how to make fairy house pumpkins with both real and carvable craft pumpkins.
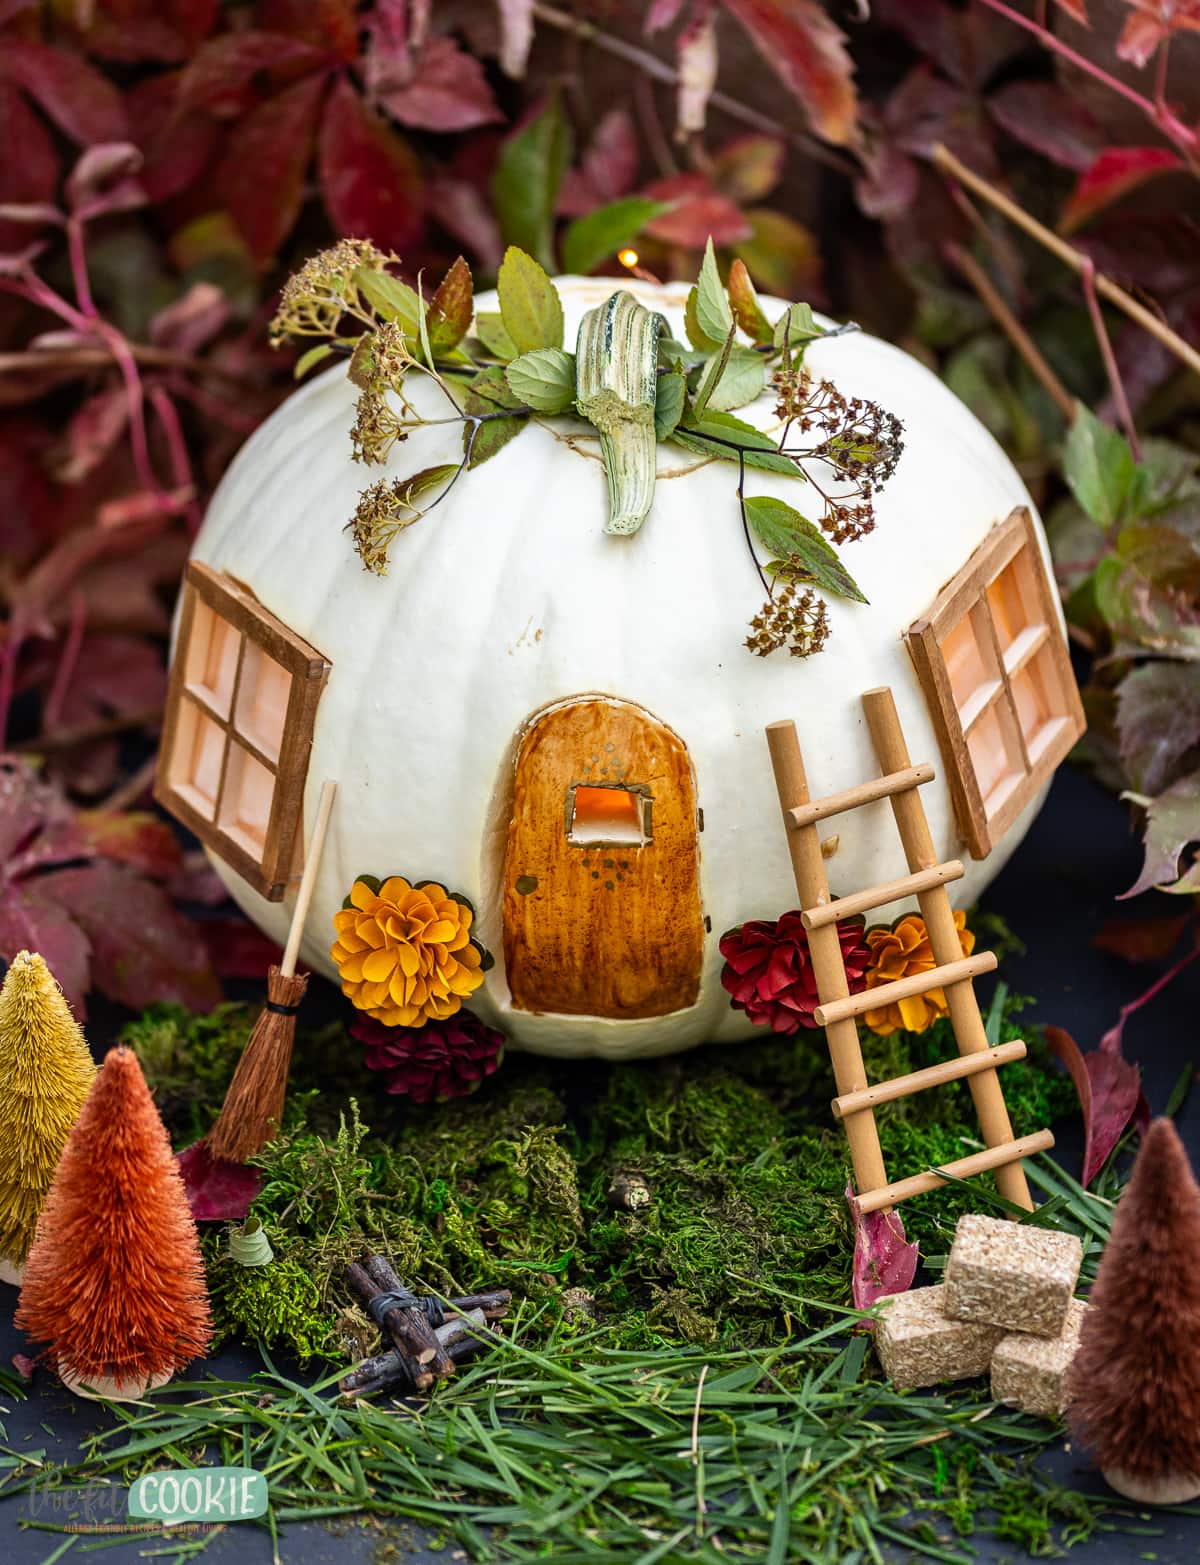
If you are looking for a fun and unique way to decorate your fall pumpkins, you definitely need to try making a pumpkin fairy house! There are so many ways to create and decorate these, the possibilities are virtually limitless.
I don’t usually do a lot of crafts here on our website, but I really enjoy a good DIY project and sometimes I can’t wait to share my creations with readers (when they turn out of course!). I was thinking of something different to do with my pumpkins and decided to make some fairy homes with them.
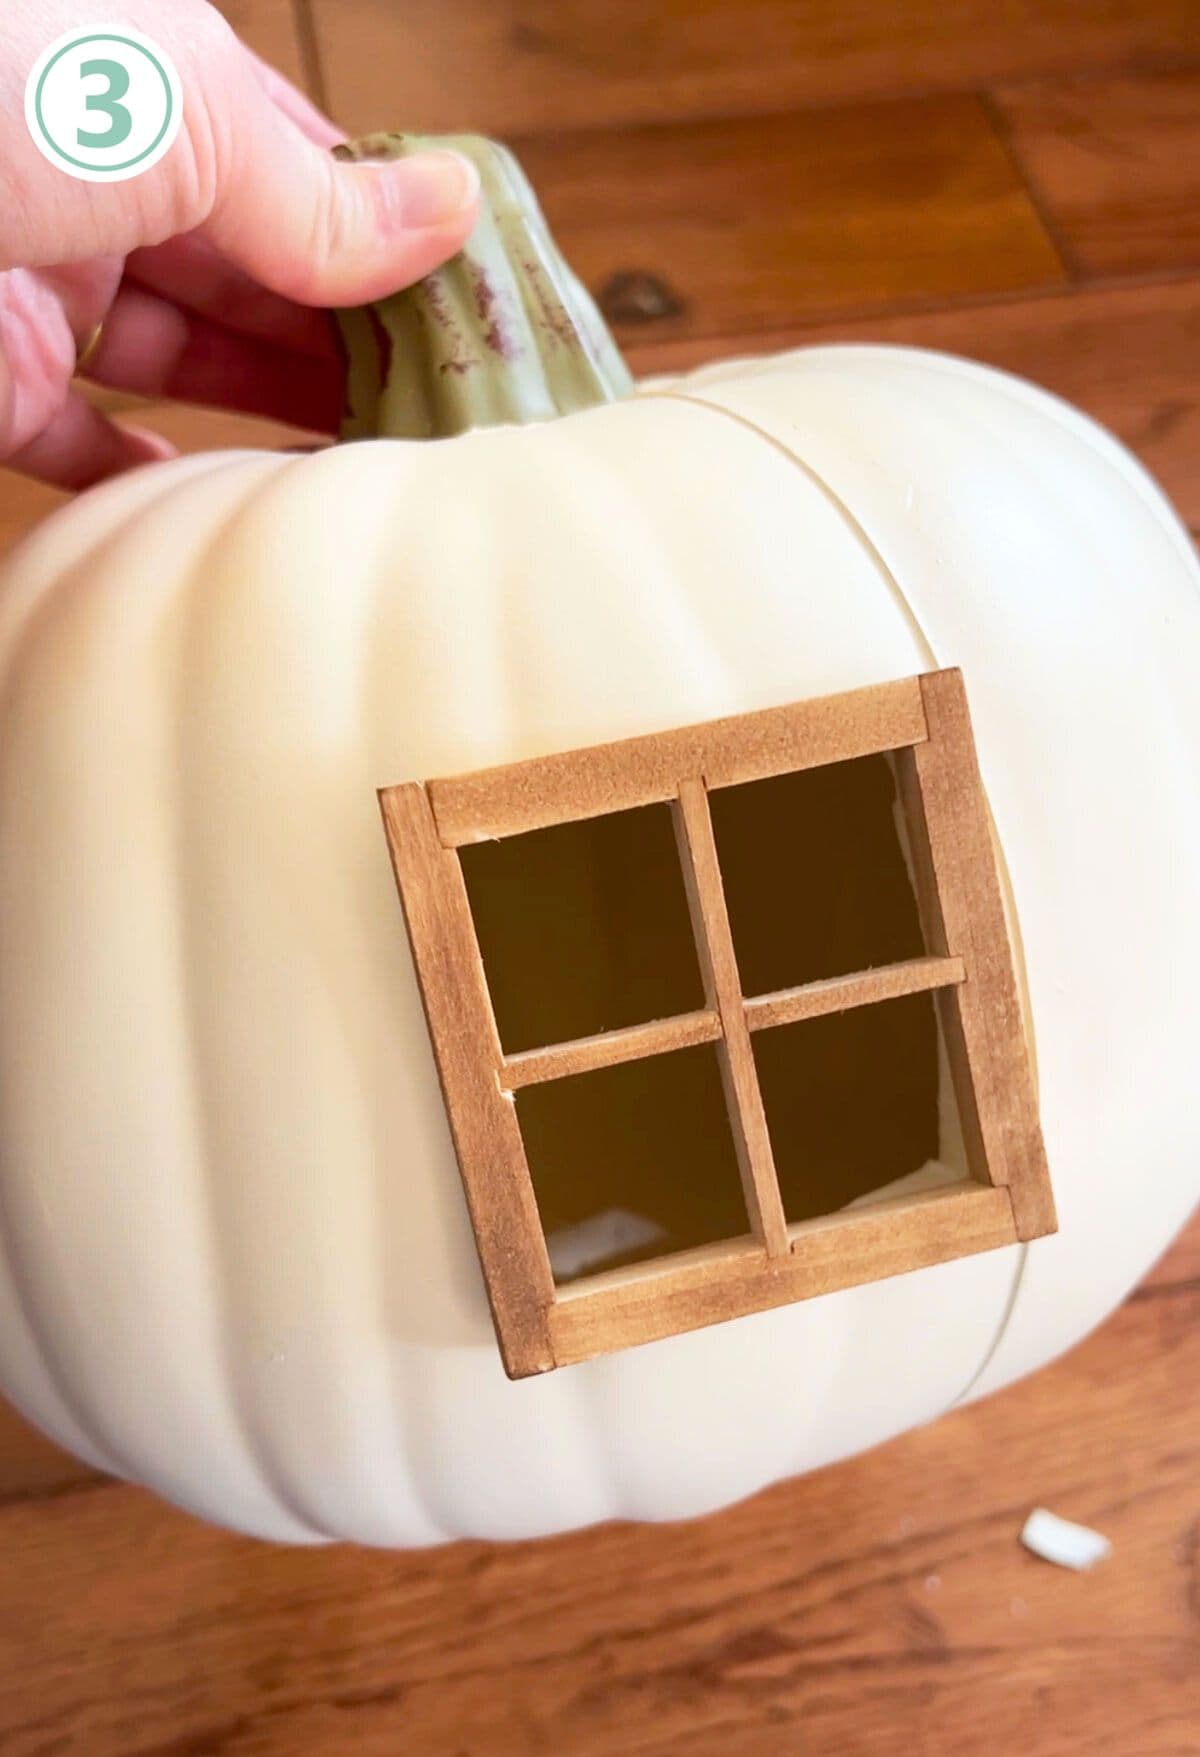
Now I’m definitely not the first person to create a fairy house pumpkin. After I decided to make a fairy house, I found out it’s not a new thing. But I decided to put my own spin on it and use pre-made dollhouse windows to make the windows easier to carve and give it more of a finished cottage look.
I tried this with both a real pumpkin and a carvable craft pumpkin, and they both turned out great (though personally, I love the real pumpkin). I’ll show you how to make a fairy house with both types of pumpkins!
How to make a pumpkin fairy house with a real pumpkin
Here are the supplies we used and the process I used for making our fairy house pumpkin!
You won’t even need a hot glue gun for this DIY unless you add some extra accessories that we don’t list here (or you want to glue everything down to make it permanent).
Equipment and supplies needed:
- Medium-sized pumpkin that isn’t super thick: I got a white pumpkin that was about 9-10 inches and it was pretty thick (the flesh of the pumpkin was about 2-3 inches thick), but I was still able to carve it and still had plenty of space inside for lights. I love the Jarrahdale pumpkins (the teal/blue-green pumpkins) to look at, but they might not be great for carving for this project since they can be very thick inside.
- Pumpkin carving knives: I like the serrated ones to reduce the risk of injuring myself, I’ve seen electric knives that would make carving easier.
- Sturdy pumpkin scoop: usually comes with a kit, if you get a good one it will have a solid scoop in it. We just upgraded to a sturdier stainless steel scoop this year, game changer!
- Wooden dollhouse windows: I got mine at Hobby Lobby, but the same style and various other styles are available on Amazon if you want a different window shape, such as round windows.
- Wood touch-up markers for coloring the wood windows (optional, I colored the wood on my windows to give it more of a finished look).
- Markers, acrylic paint, or wooden elf doors to create the door (I “painted” my door with a marker after I carved out 3 sides).
- Fairy lights or flameless candles
- Fairy house accessories and miniatures: I used moss, a mini ladder, mini hay bales, etc. (I’ll add more details and suggestions further down in the post!).
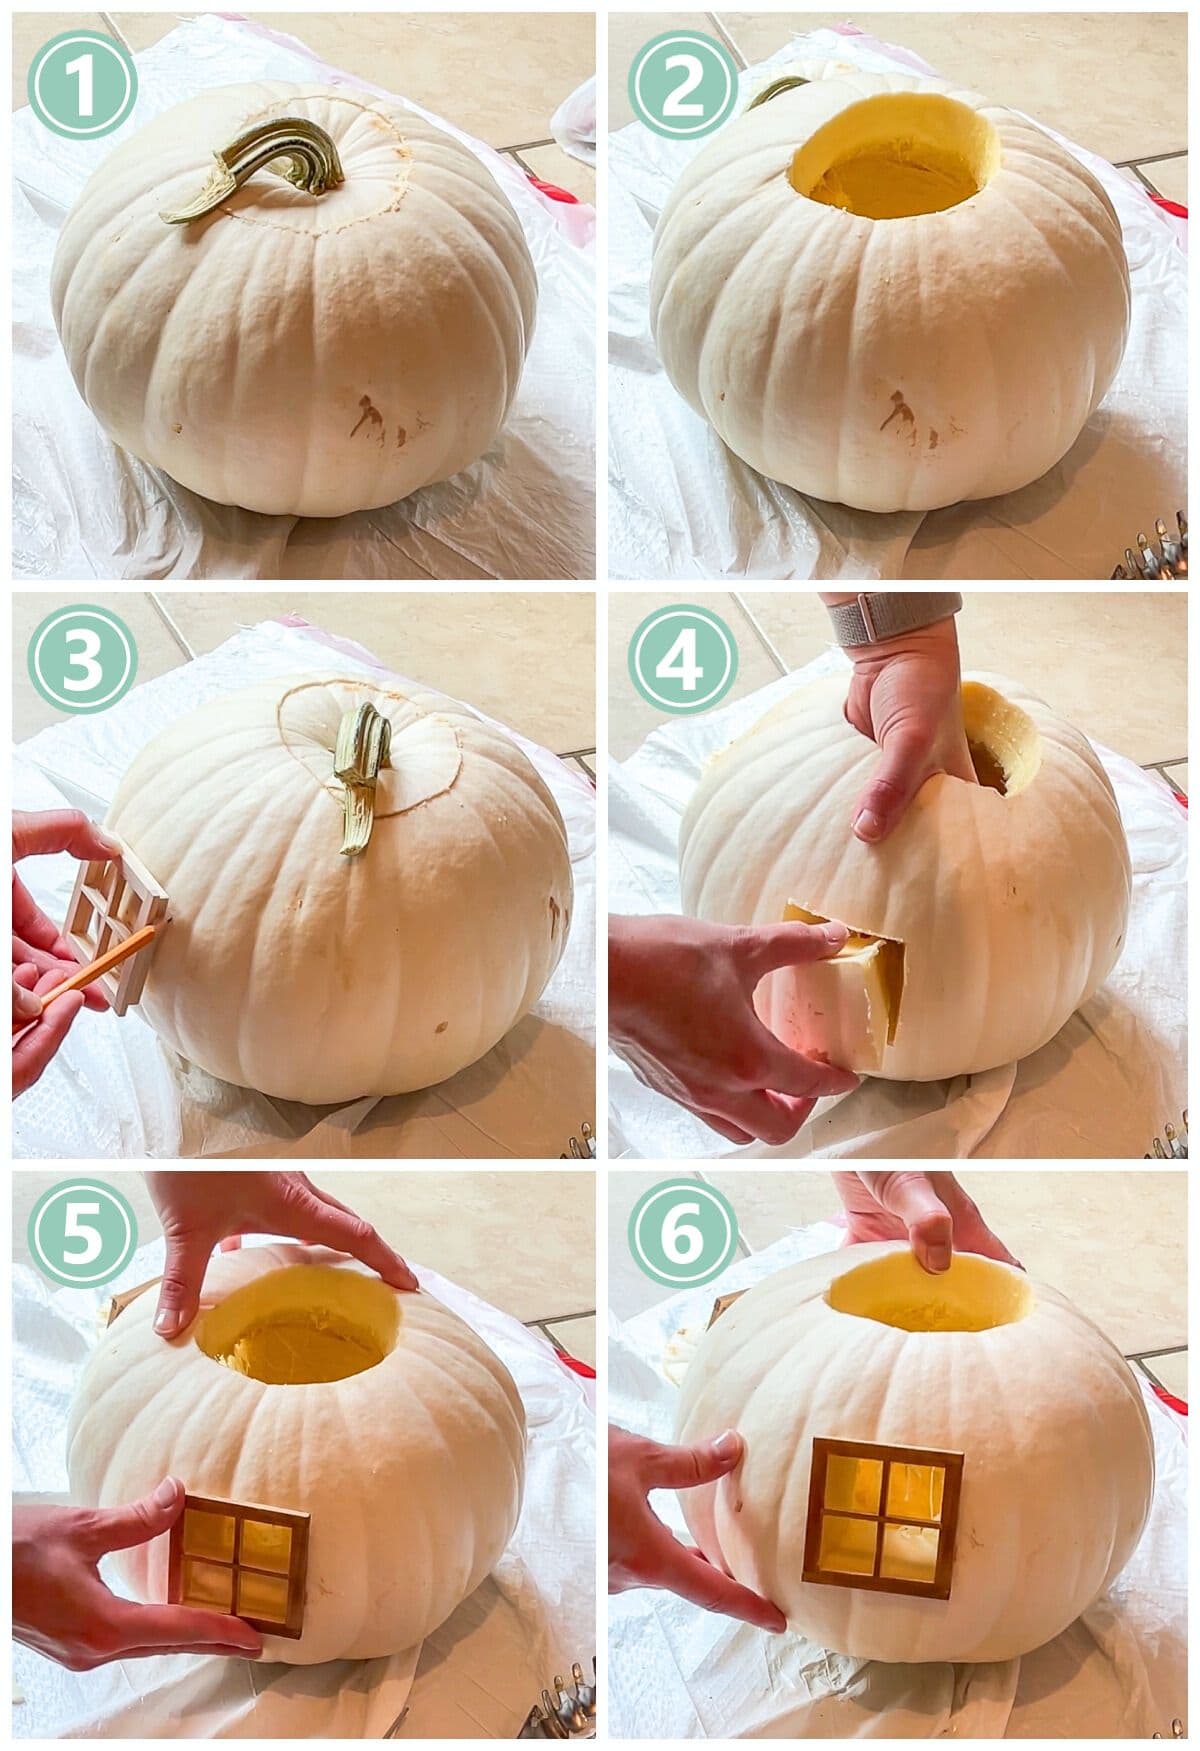
Steps to make a fairy house with a real pumpkin
Here are the steps that I took to make my white pumpkin fairy house:
- Wash the pumpkin first and then cut the top around the stem.
- Remove the top of the pumpkin and scrape out the insides, discarding or separating and roasting the seeds if you want.
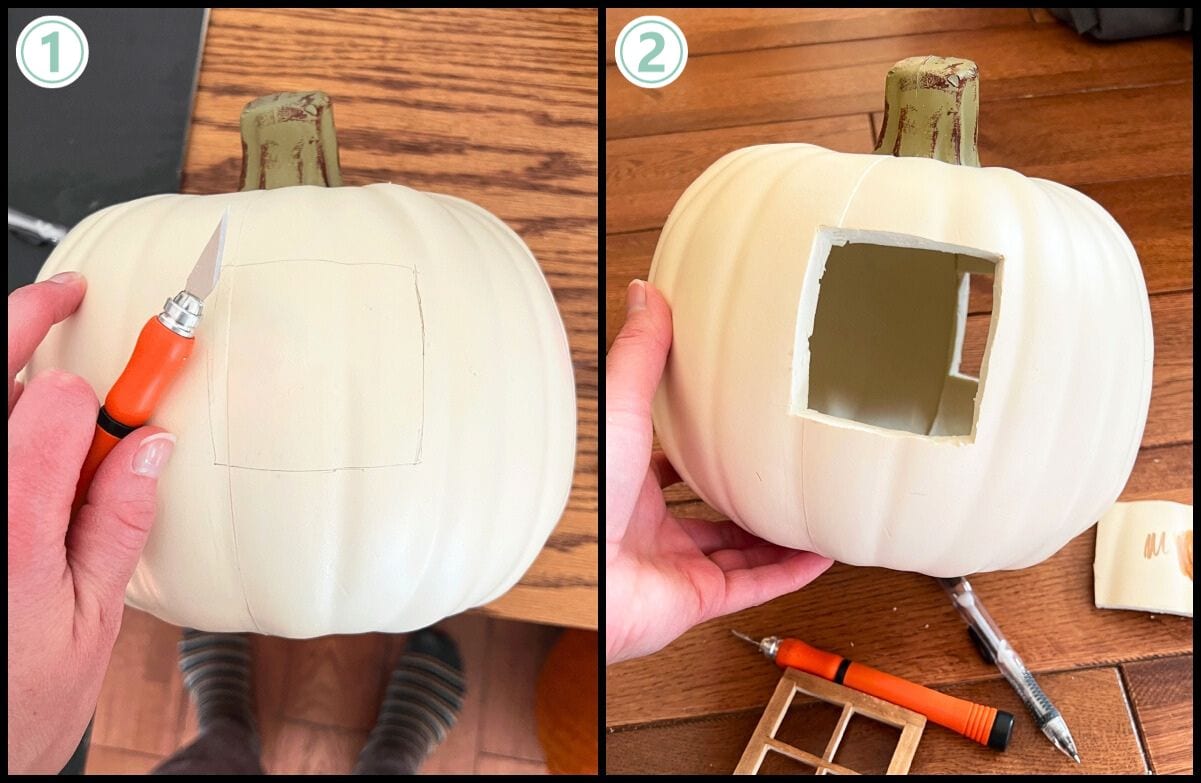
- Trace around the wooden dollhouse window onto the pumpkin.
- Cut out the window hole and remove it.
- Make sure your window fits properly before moving on to the next window and the door. If needed, you can shave off additional pumpkin around the window to make sure it fits properly and snugly.
- Repeat the same process for the second window.
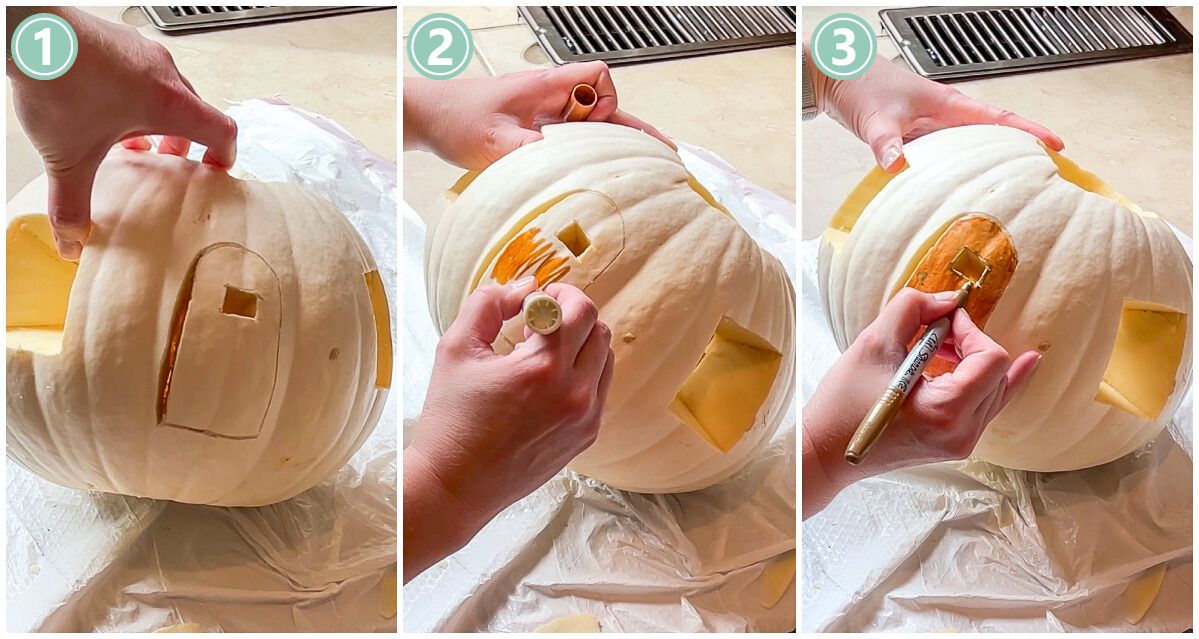
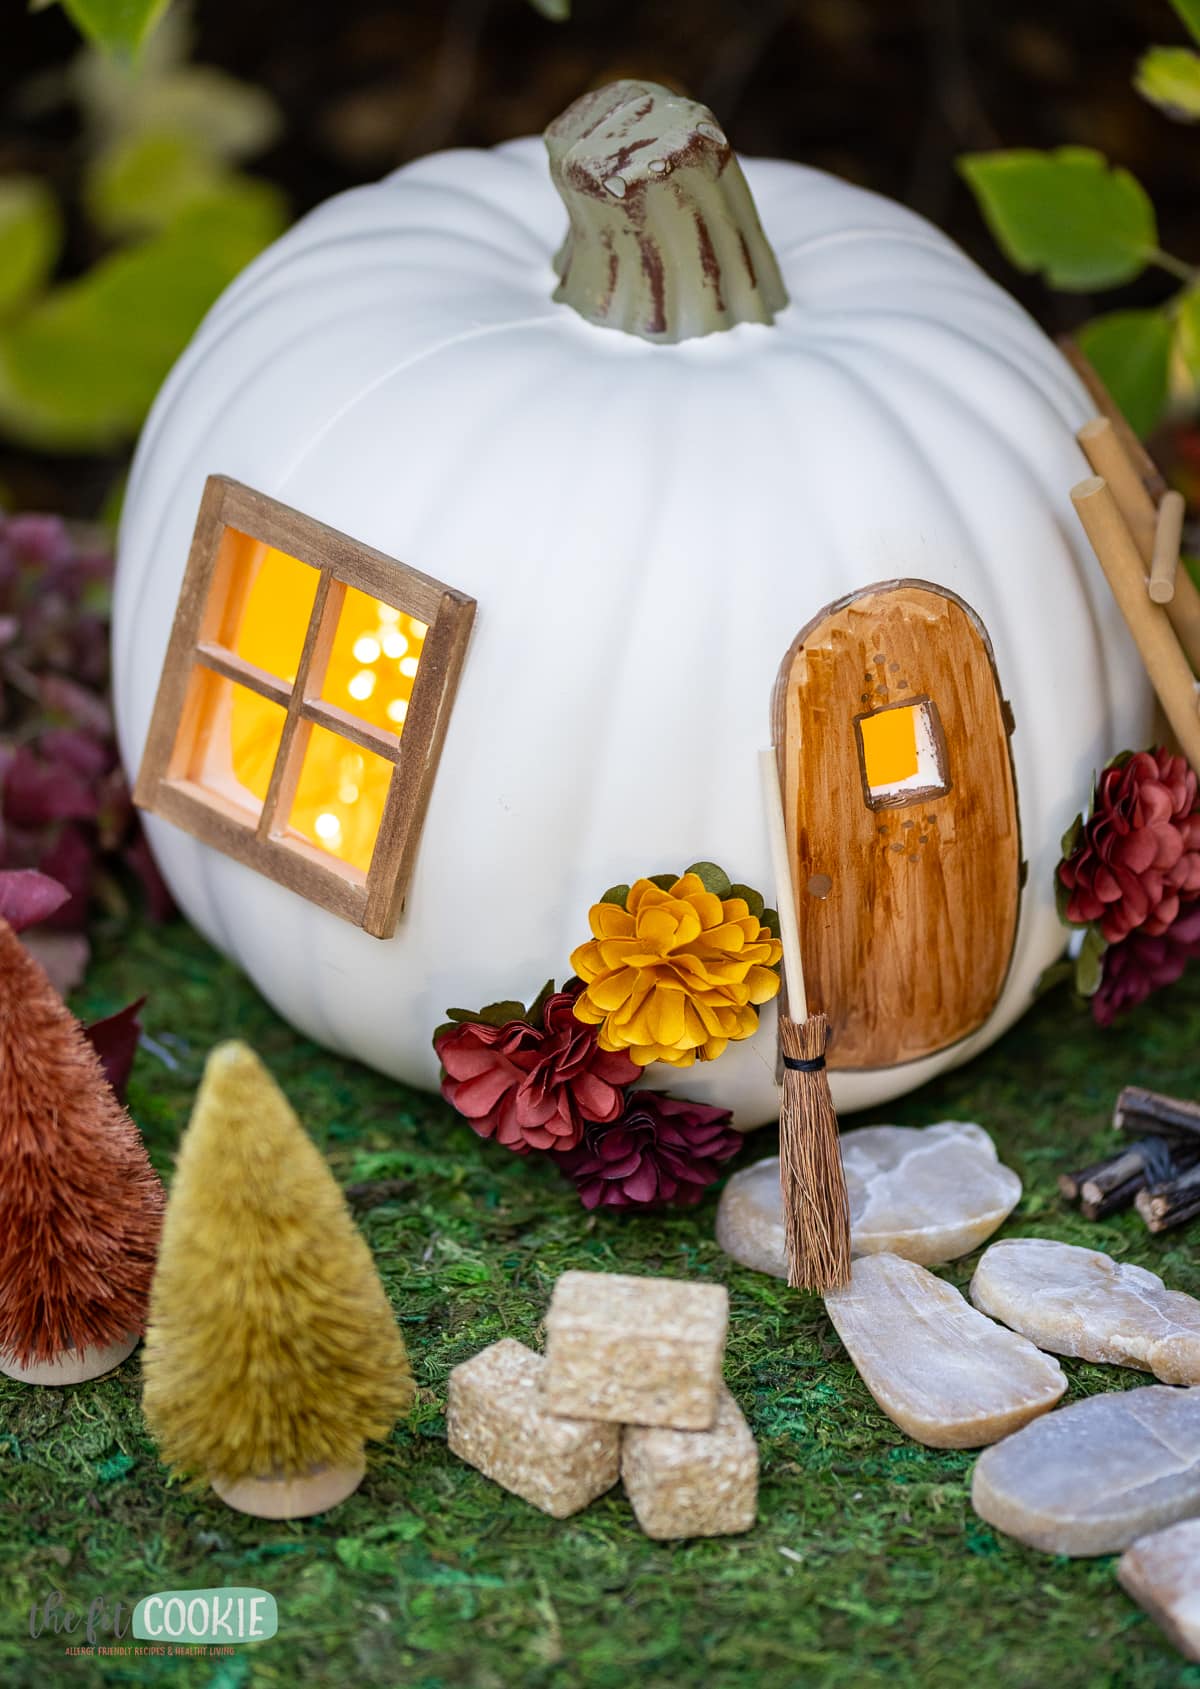
- For the door, there are several options: 1) cut the door out, 2) paint on a door, or 3) carve out a space for a wooden elf or fairy door. I did a combo of the first 2, I cut out 3 sides of a door and then “painted” it with a wood marker and added accents with a gold paint marker. It turned out pretty cute, although I think actual wooden doors would be the perfect addition for both of these pumpkin houses.
- Put the windows into the pumpkin, and you’re ready to decorate how you’d like!
If you’d like a circular window in your door, you can try using a small metal cookie cutter or an apple corer to easily create a small round window. I don’t have an apple corer otherwise I would have tried this myself!
Pros and cons of using a real pumpkin
I mentioned earlier that I really liked the look of the real pumpkin house compared to the craft pumpkin, however, the biggest drawback is that the real pumpkin won’t last. Once you carve it, it will probably only last about a few days or up to a week.
But if that’s not an issue, you will still get to reuse all the miniatures again year after year. So each year you can just carve a new pumpkin and use the same accessories!
Plus a natural pumpkin will work well outside if you want to put the fairy house on your porch or in your existing fairy garden. You might have to pick different miniature accessories if it’s going to be outdoors, however, since not all of them will do well outside.
You can put several of these little houses together in your yard to create a pumpkin fairy garden!
Pros:
- Looks more natural
- Uses more natural materials (opt for natural options for paints and markers if you are trying to keep things natural)
- Does well displayed outdoors
- Generally costs less than a craft pumpkin
- You don’t need sharp tools (most pumpkin carving sets aren’t sharp)
Cons:
- Won’t last more than about 3 to 5 days once carved.
- Heavier weight and not as easy to transport on a board
How to make a fairy pumpkin house with a carvable craft pumpkin
After I had made my real pumpkin fairy house, I decided to try it with a foam craft pumpkin. It also worked great!
The process is very similar to the real pumpkin with a few key differences: the cutting tools are different, and you’ll want to cut the hole for the lights on the bottom of the pumpkin vs the top.
Equipment and materials you’ll need:
- 8 to 12-inch carvable craft pumpkin: make sure that it’s the kind made for carving otherwise it won’t work. I bought an 8-inch white one at our local Walmart.
- X-acto knife (or similar)
- Wooden dollhouse windows
- Wood touch-up markers for coloring the wood windows (optional)
- Markers, acrylic paint, or wooden elf doors to create the door: I “painted” my door with brown marker and gold paint pen.
- Fairy lights or flameless votive candles
- Fairy house accessories and miniatures: I used fairy lights, stepping stones, etc. (we’ve added a list with links a bit farther down in the post).
Steps to make your miniature house with a craft pumpkin
- Decide where you’d like to put the windows and doors.
- Place the wooden dollhouse window where you’d like it on the pumpkin and trace around it in pencil.
- Using care, cut the windows out with the X-acto knife (they are very sharp so be careful with the cutting). The pumpkin I had was about 1/2-inch thick so your knife will need to be slightly longer than that.
- If you’re using a wooden elf door, follow the same steps to trace and cut out the door. Or you can paint it as I did with a brown marker and gold paint pen.
- Cut out a hole in the bottom for your light of choice (make sure it fits the light you choose).
- Once you’re done carving the windows and door, put the windows in place and decorate your pumpkin and scene with fairy accessories and miniatures.
When cutting the hole out of the bottom of the craft pumpkin, you’ll want to make sure it will fit the size of your light source.
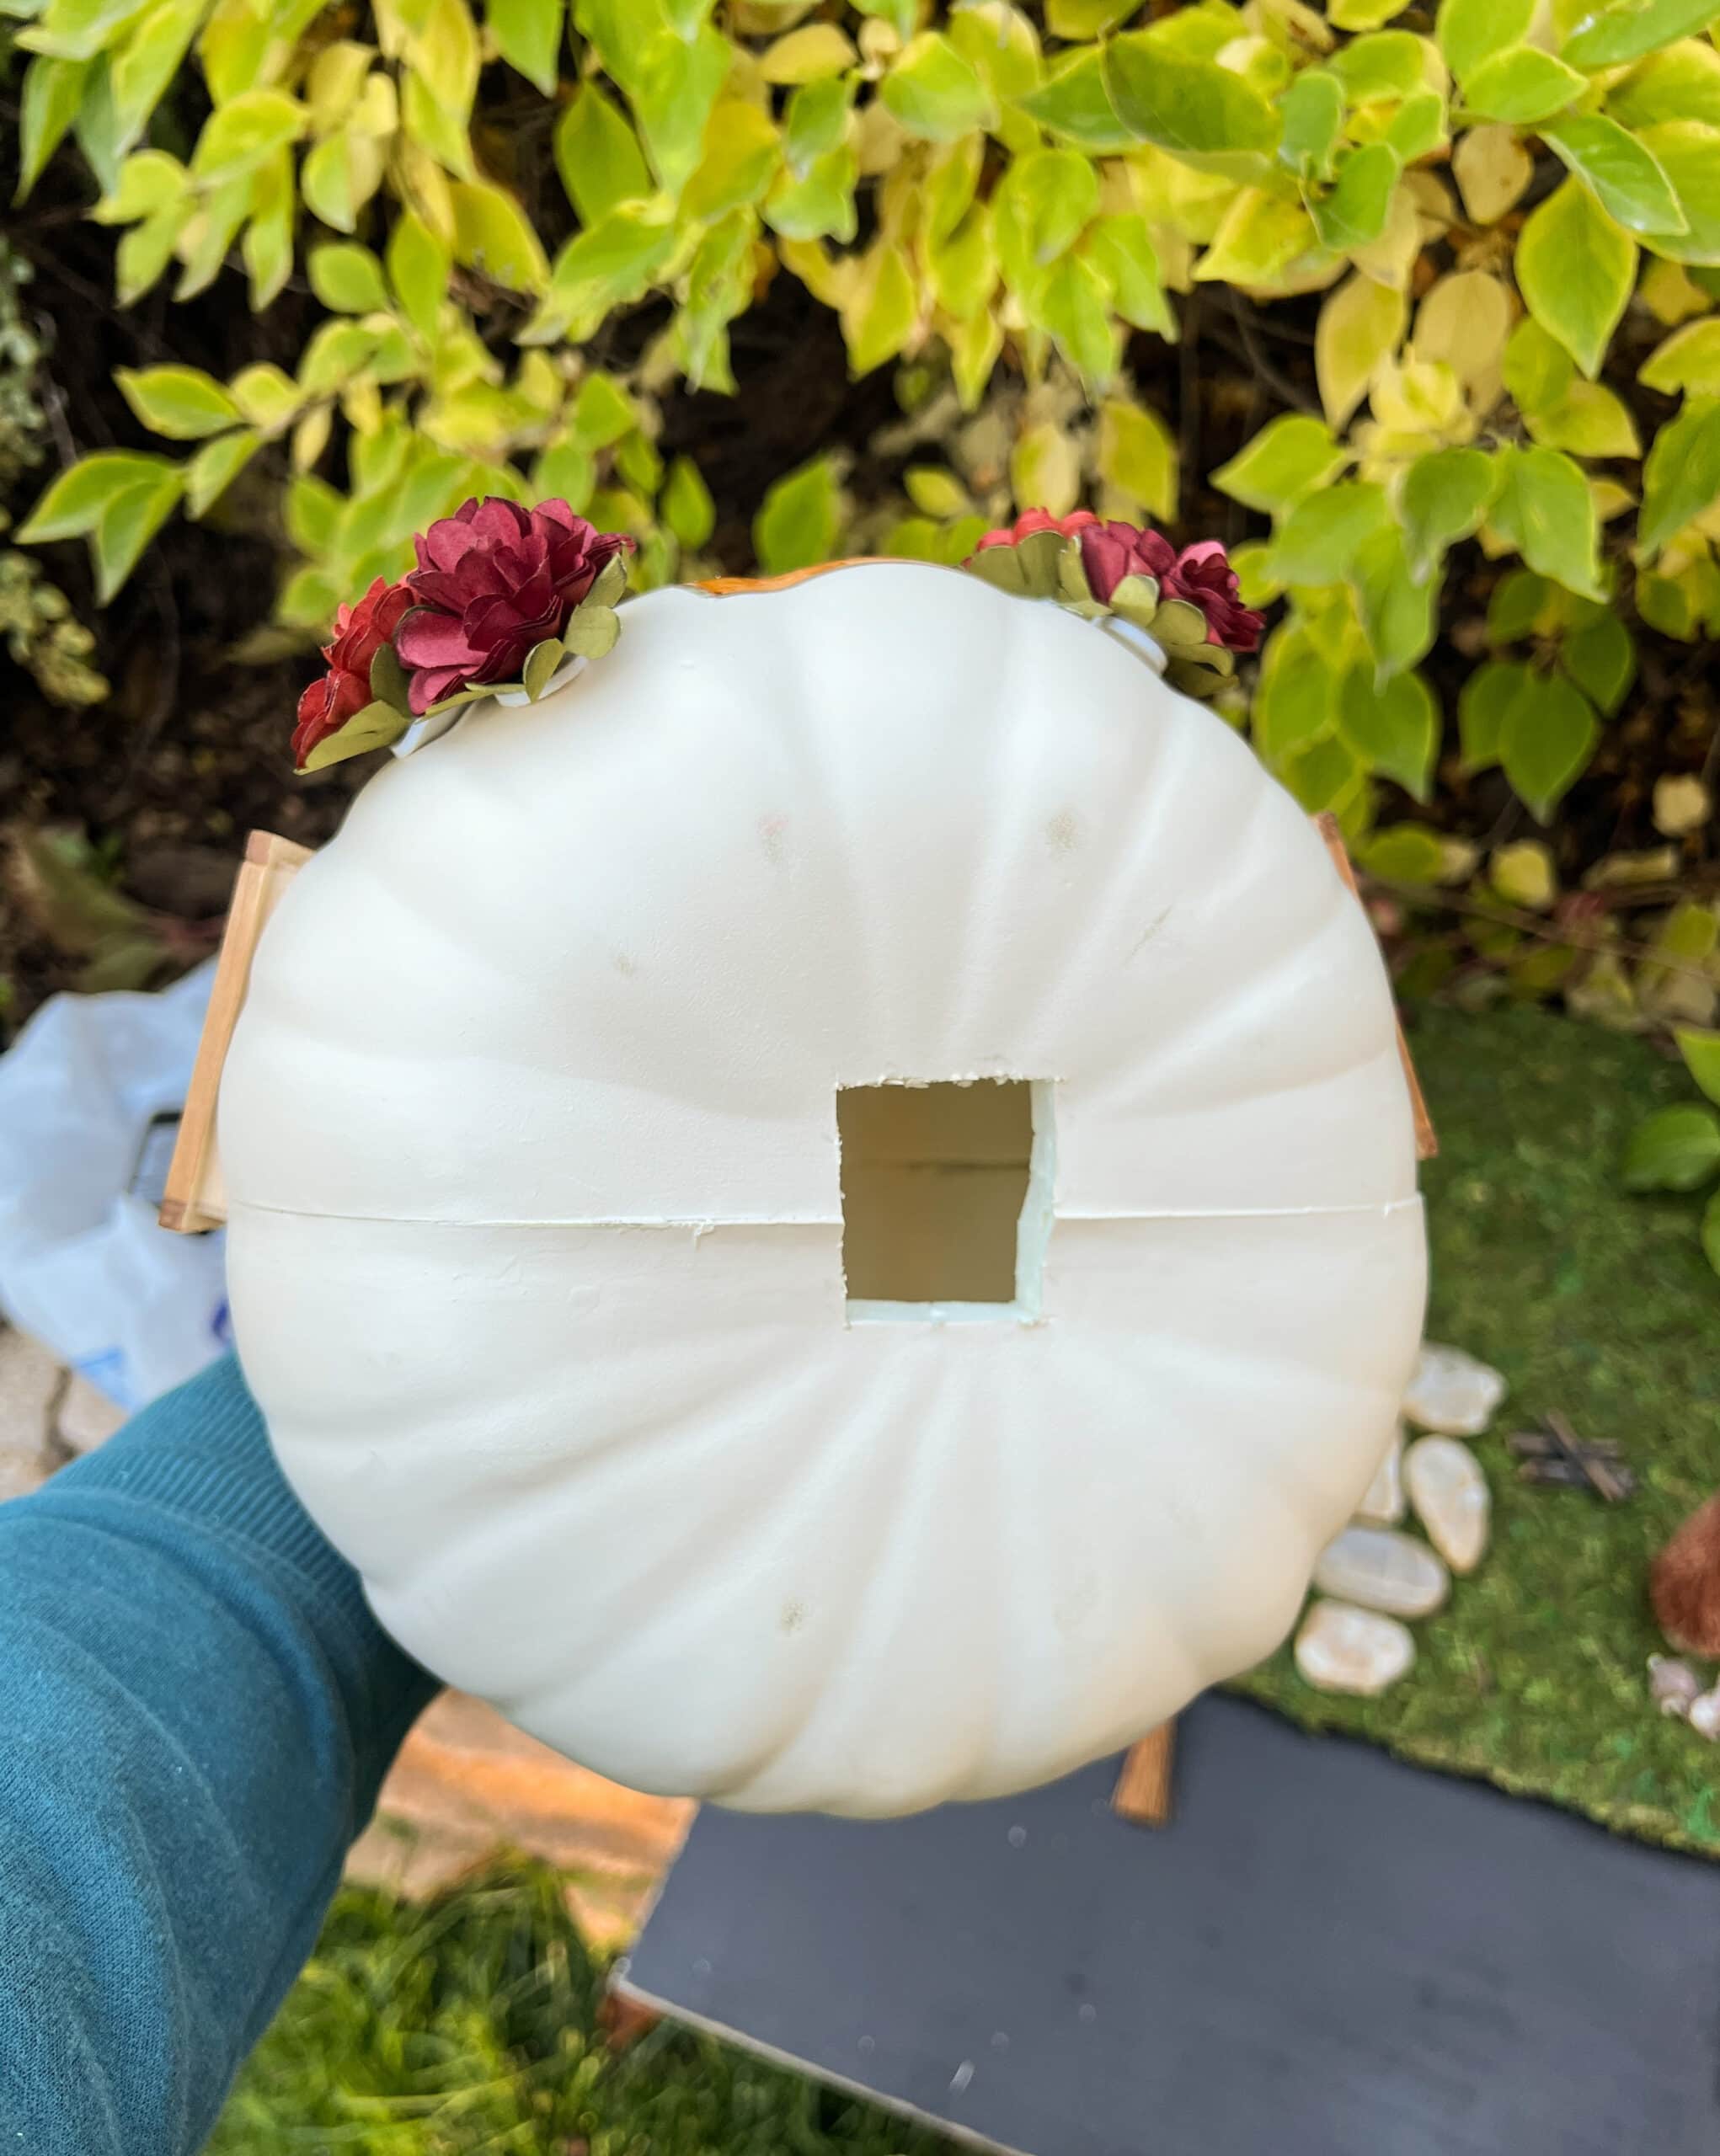
Since I used fairy lights to light up my pumpkin, the size of this hole was sufficient. But if you’re using a flameless tealight candle, make sure the hole in the craft pumpkin will fit the candle you’re using.
Pros and cons of using a craft pumpkin
The great thing about using a craft pumpkin for a cute little house is that it will last for years, so you can carve it and save it again for next year. One of my favorite parts about the craft pumpkins is that you don’t have to scoop anything from the inside!
A couple of things I didn’t like about the craft pumpkin was that it had a strong plastic smell when I was cutting it, which is something to consider if you have chemical sensitivities.
Also, you’ll need to use an X-acto knife or other sharp knife for carving the craft pumpkin, so if you have smaller kids who will want to participate, that is something to keep in mind.
Another consideration is cost. The craft pumpkin I bought wasn’t too expensive, but it does cost a bit more than a real pumpkin. The additional cost is something to consider if you mess up your carving and need a new one (or two).
Pros:
- Long-lasting, should keep for years
- No scooping out the insides
- Lightweight
Cons:
- Has a strong plastic smell when cutting
- Needs a sharp knife
- Generally costs more than a real pumpkin
- Might not do well outdoors
Decorating and accessorizing your fairy pumpkins
There are so many ways you can decorate your little pumpkin house, like a cute or spooky Halloween fairy garden, fall cottage-core, etc. I went with a fall cottage-style decoration theme.
Here are the things I added to my scene, I used items mostly from my local Hobby Lobby. I’ll add links to some of the items on Hobby Lobby, but since they often remove items from their site when they go out of season, I’ll mostly link to the equivalents on Amazon, too.
- Board for creating the scene: you can use a sturdy piece of cardboard, foam board, or a piece of wood. I had some wood boards sitting around that I use for photos and crafts, so I used a board I had painted with black chalk paint since I didn’t like the color of the cardboard piece I had used initially.
- Moss or grass: with the real pumpkin scene, I used a loose moss and it got pretty messy (though it looked cute). So when I made the craft pumpkin house, I found a moss mat to use instead to keep things less messy and make it cover more of my board. You can also use a faux grass mat as well.
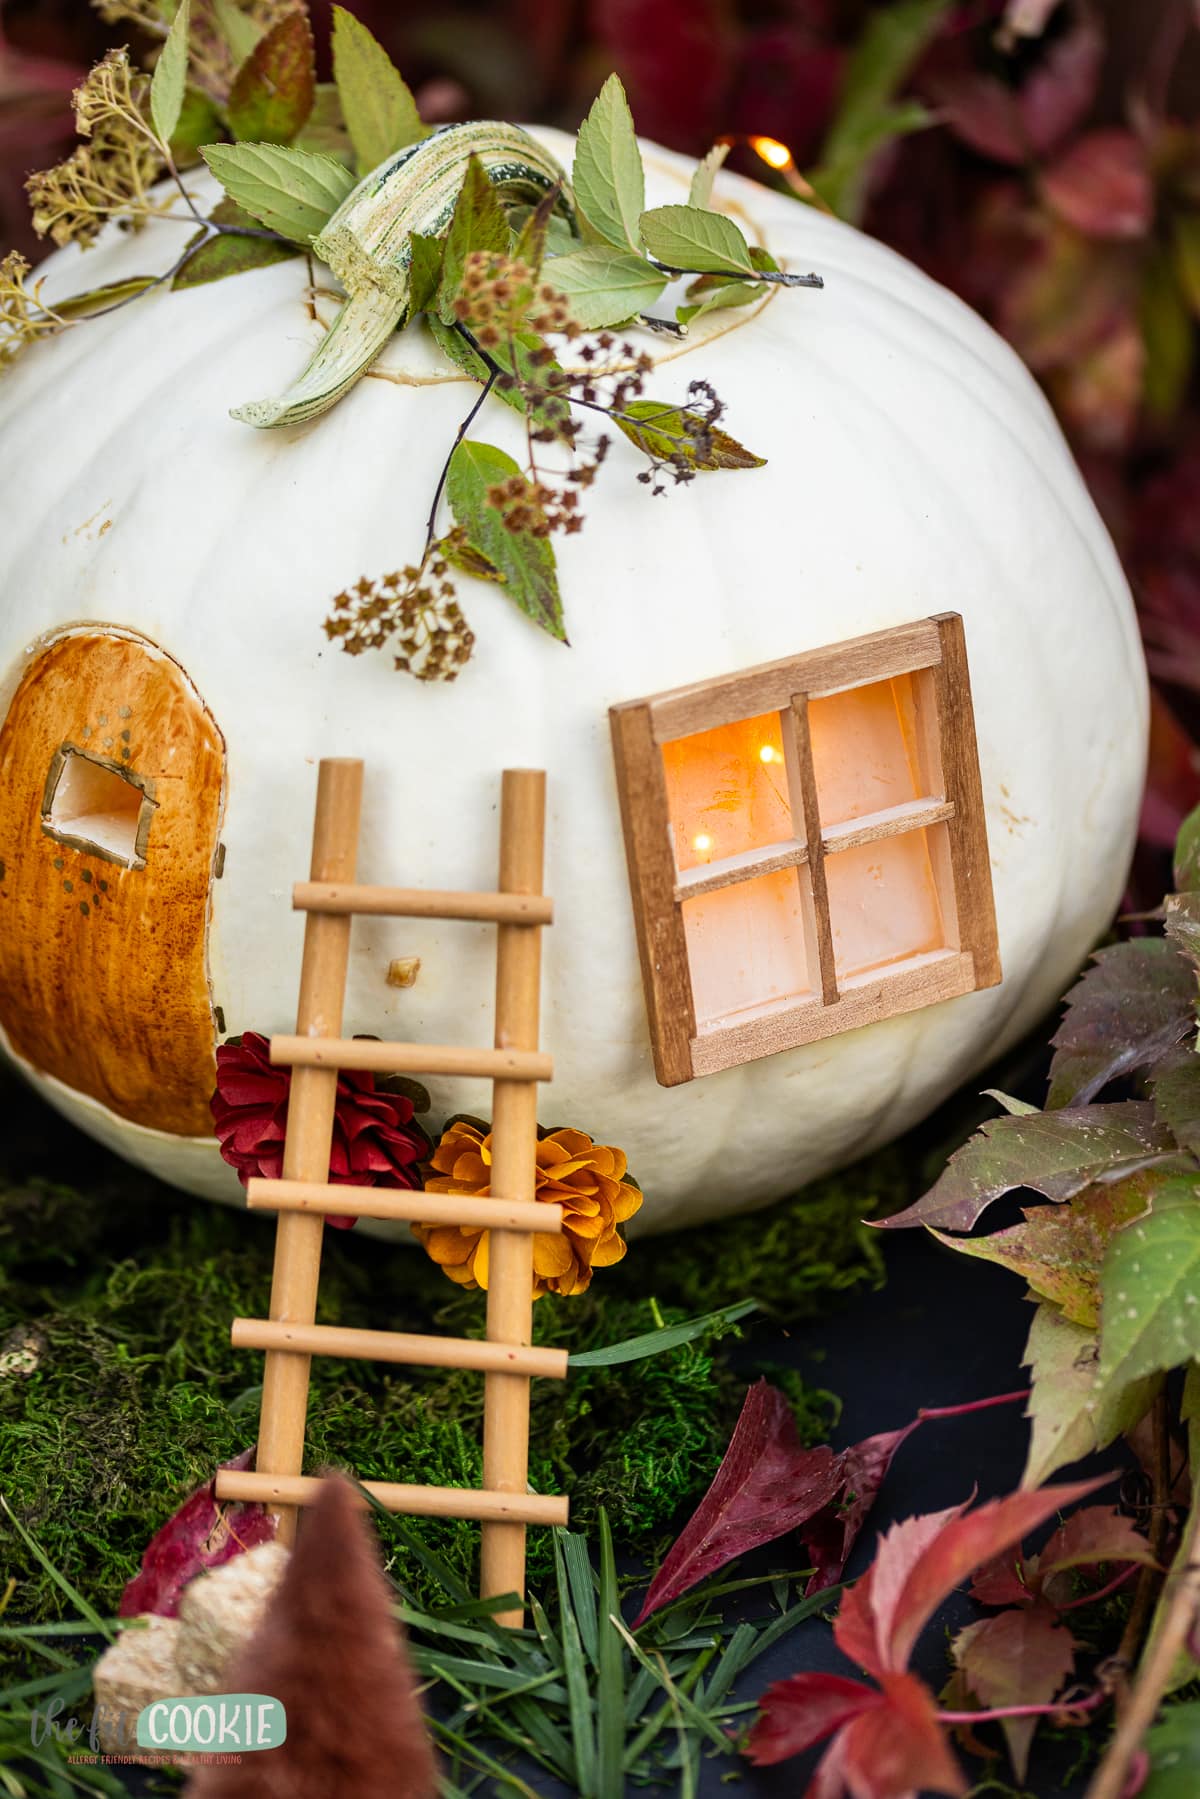
- Greenery: for the real pumpkin fairy house, I used stems from one of the bushes in my yard to add some greenery to the top of the pumpkin and to hide the carving lines on top. I didn’t add anything to the craft pumpkin house, but you can add tiny faux vines to the top as well if you like.
- Stepping stones or path: when I made the real pumpkin house, I didn’t add a path, but for the craft pumpkin I added some flat mosaic stones to create a path. You can also use small pebbles as well for a path, or even wood slices.
- Fall-colored bottle brush trees: I don’t see the ones I got from Hobby Lobby on their site, but Amazon has a similar set .
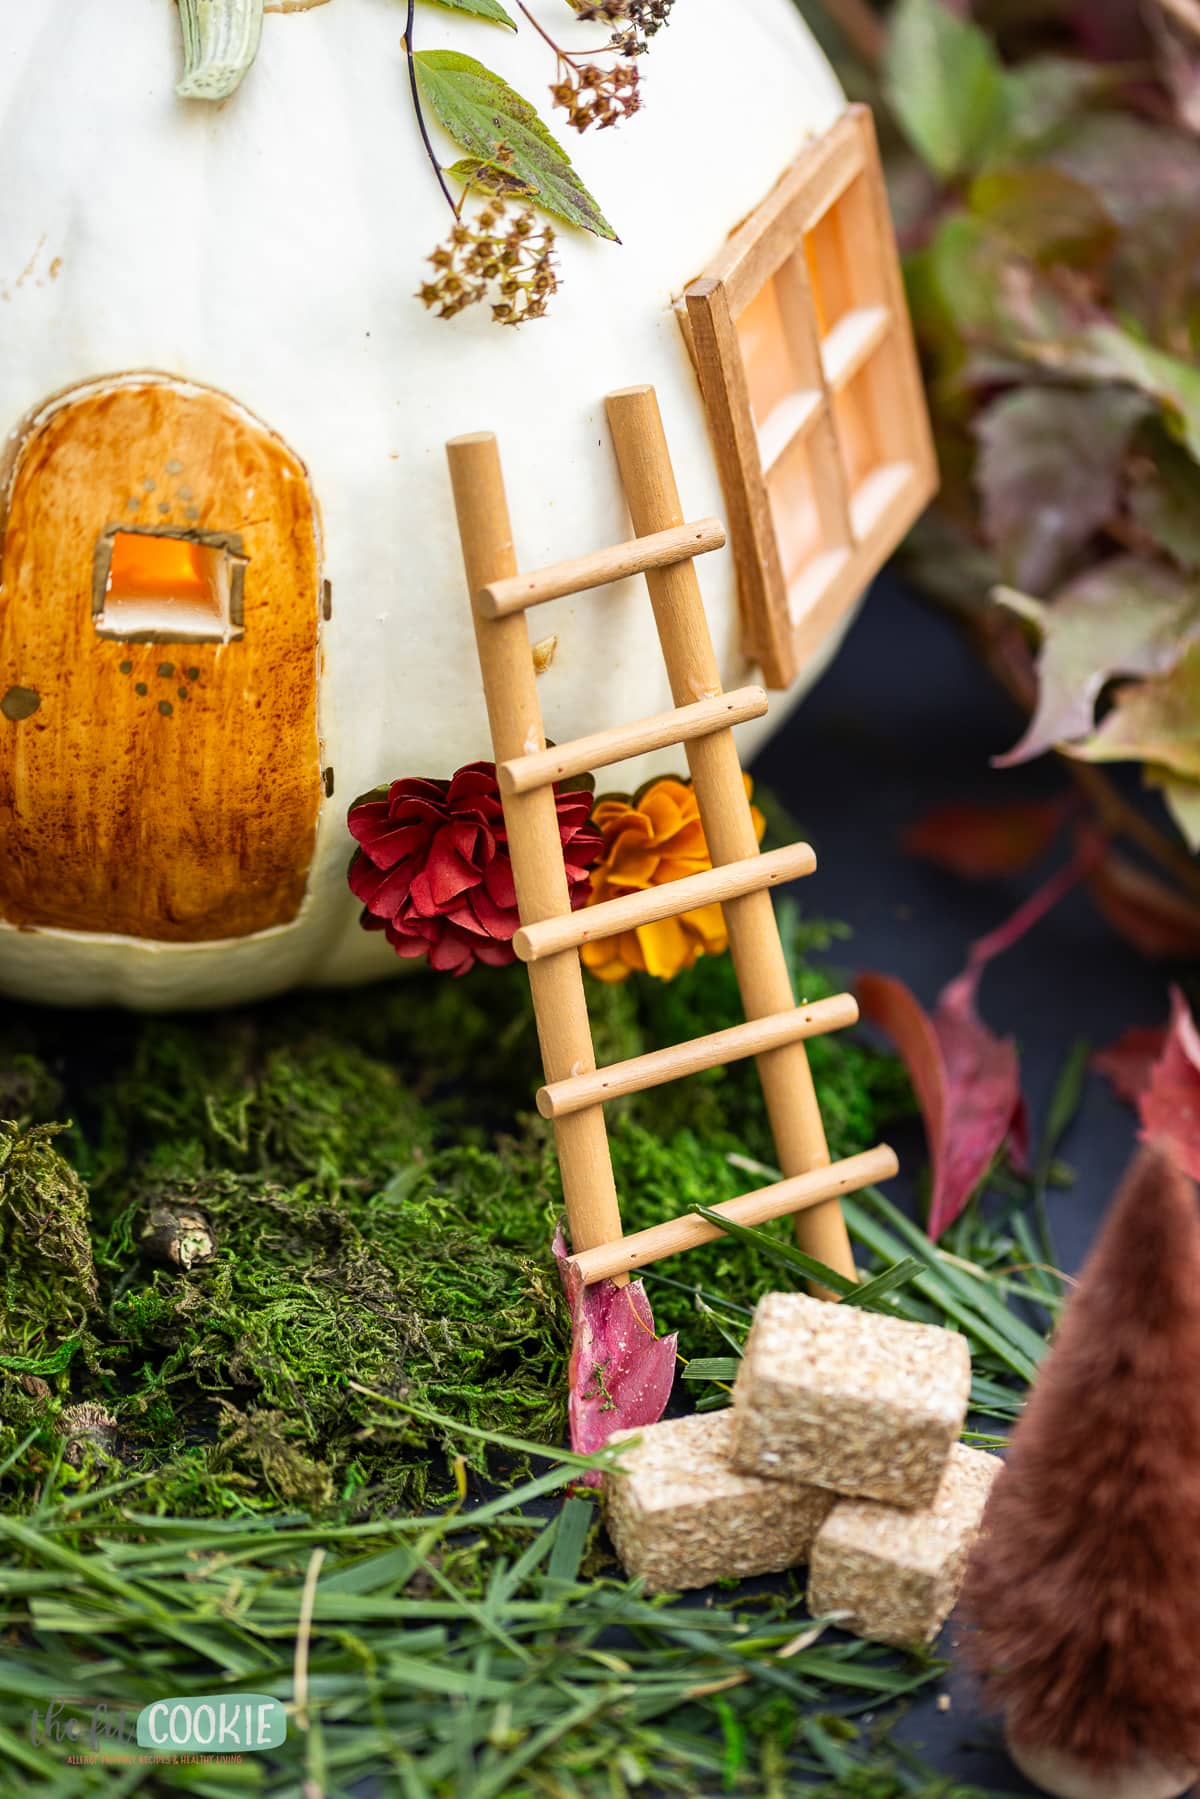
- Miniature accessories: I went to the fairy garden area and the miniatures area of Hobby Lobby to find some accessories to add to my fairy house, including a tiny ladder, a mini broom, mini hay bales, and tiny stacks of wood.
- Mum flower stickers: when I saw the 3D mini mum flower stickers I knew I had to find a way to add them to the pumpkin! These are super cute and look great, the sticker has a strong adhesive so it sticks very well, too.
- Lights for the inside of the pumpkin: for both pumpkins, I used a string of warm LED fairy lights (which would also look nice on the outside of the pumpkin, too), but you can use a battery-powered candle as well.
Other ideas for miniature accessories:
- Picket fence
- Mini resin mushrooms
- Resin animals (I added a tiny rabbit to my craft pumpkin scene)
- Tiny potted plants
- Mini wheelbarrow or garden tools
- Arbor or trellis (I found a cute arbor to use but I couldn’t make it fit the scene so I took it off)
- Mini vine with lights
- Fresh or pressed autumn leaves
We collected some items in our Amazon storefront list you can check out!
If you are looking for another great fall DIY project, check out our borax crystal pumpkins!
How to Make a Cute Pumpkin Fairy House (2 Ways)
Equipment and materials
- 2 wooden dollhouse windows, 2.5×2.5-inches
- Board for displaying pumpkin scene
- Fairy lights or flameless tea light candles
- Wood touch-up markers, optional (if you want to add some color to your wood dollhouse windows)
- Acrylic paint, markers, or wooden elf doors
- Your favorite miniatures for the scene (mini hay bales, mini brooms, bottle brush trees, etc.)
If using a real pumpkin:
- 1 8-12 inch pumpkin
- Pumpkin carving knife set with scoop
If using a craft pumpkin:
- 1 8-12 inch carvable craft pumpkin (make sure it's the dense foam kind meant for carving)
- 1 X-acto knife
Instructions
Real pumpkin fairy house:
- Wash the pumpkin first and then cut the top around the stem.
- Remove the top of the pumpkin and scrape out the insides, discarding or separating and roasting the seeds if you want.
- Trace around the wooden dollhouse window onto the pumpkin.
- Cut out the window hole and remove it.
- Make sure your window fits properly before moving on to the next window and the door. If needed, you can shave off additional pumpkin around the window to make sure it fits properly and snugly.
- Repeat the same process for the second window.
- For the door, there are several options: 1) cut the door out, 2) paint on a door, or 3) carve out a space for a wooden elf or fairy door. I did a combo of the first 2, I cut out 3 sides of a door and then “painted” it with wood marker and added accents with gold paint marker.
- Put the windows into the pumpkin, and you’re ready to decorate how you’d like!
With a carveable craft pumpkin:
- Decide where you'd like to put the windows and doors on your pumpkin.
- Place the wooden dollhouse window where you’d like it on the pumpkin and trace around it in pencil.
- Using care, cut the windows out with the X-acto knife (they are very sharp so be careful with the cutting). The pumpkin I had was about 1/2-inch thick so your knife will need to be slightly longer than that.
- If you’re using a wooden elf door, follow the same steps to trace and cut out the door. Or you can paint it like I did with brown marker and gold paint pen.
- Cut out a hole in the bottom for your light of choice (make sure it fits the light you choose).
- Once you’re done carving the windows and door, put the windows in place and decorate your pumpkin and scene with fairy accessories and miniatures.
Video

Sarah Jane Parker is the founder, recipe creator, and photographer behind The Fit Cookie which she founded in 2011. Sarah is based in Wyoming and has been managing food allergies for herself and her 2 children for over 20 years. Sarah was also a certified personal trainer for 12 years, as well as a group fitness instructor, health coach, running coach, and fitness nutrition specialist.