Our dry method dairy free caramel is a great way to make caramel if you like deeper caramel with almost burnt sugar notes! This advanced method of caramel making results in a darker caramel that has intense flavor.
If you love the burnt sugar tastes of dark caramel, you’ll love this recipe for dry method dairy free caramel!
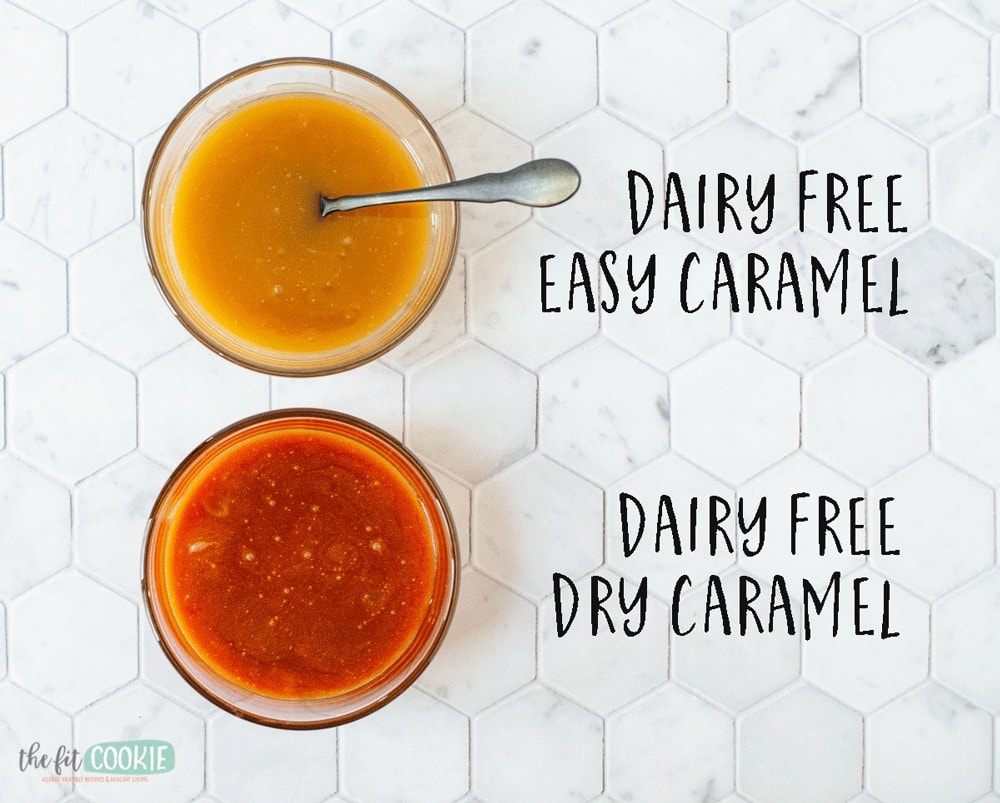
This is our 3rd and more advanced method of dairy free caramel making compared to our other 2 recipes: our easy dairy free caramel and the dairy free wet method caramel (and intermediate method).
Traditional caramel making has 2 different techniques: the wet method and dry method.
“Dry” caramel is so named because you begin the recipe by melting the sugar in the pan by itself without adding any liquid with the sugar, so it starts out dry. The wet method adds a bit of water to help melt the sugar, but the dry method starts with just dry sugar.
This dry method of caramel making is much more touchy and easier to scorch than the easy method or wet method I’ve shared, but the flavors are deeper and the color is darker for those who want a deep and dark caramel.
- Pros: closest tasting to real caramel, has much darker caramel color, has less re-crystallization of sugar even without corn syrup.
- Cons: more difficult to make than the easy method and the wet caramel method, harder to get this recipe right since it can burn so quickly.
For dry caramel, regular white/bleached sugar is preferred. You can use unbleached sugar or raw sugar, but it is more likely to scorch easier.
How to make dry method dairy free caramel
I adapted this method for dry caramel from several websites that detailed very similar recipes and steps, including Broma Bakery.
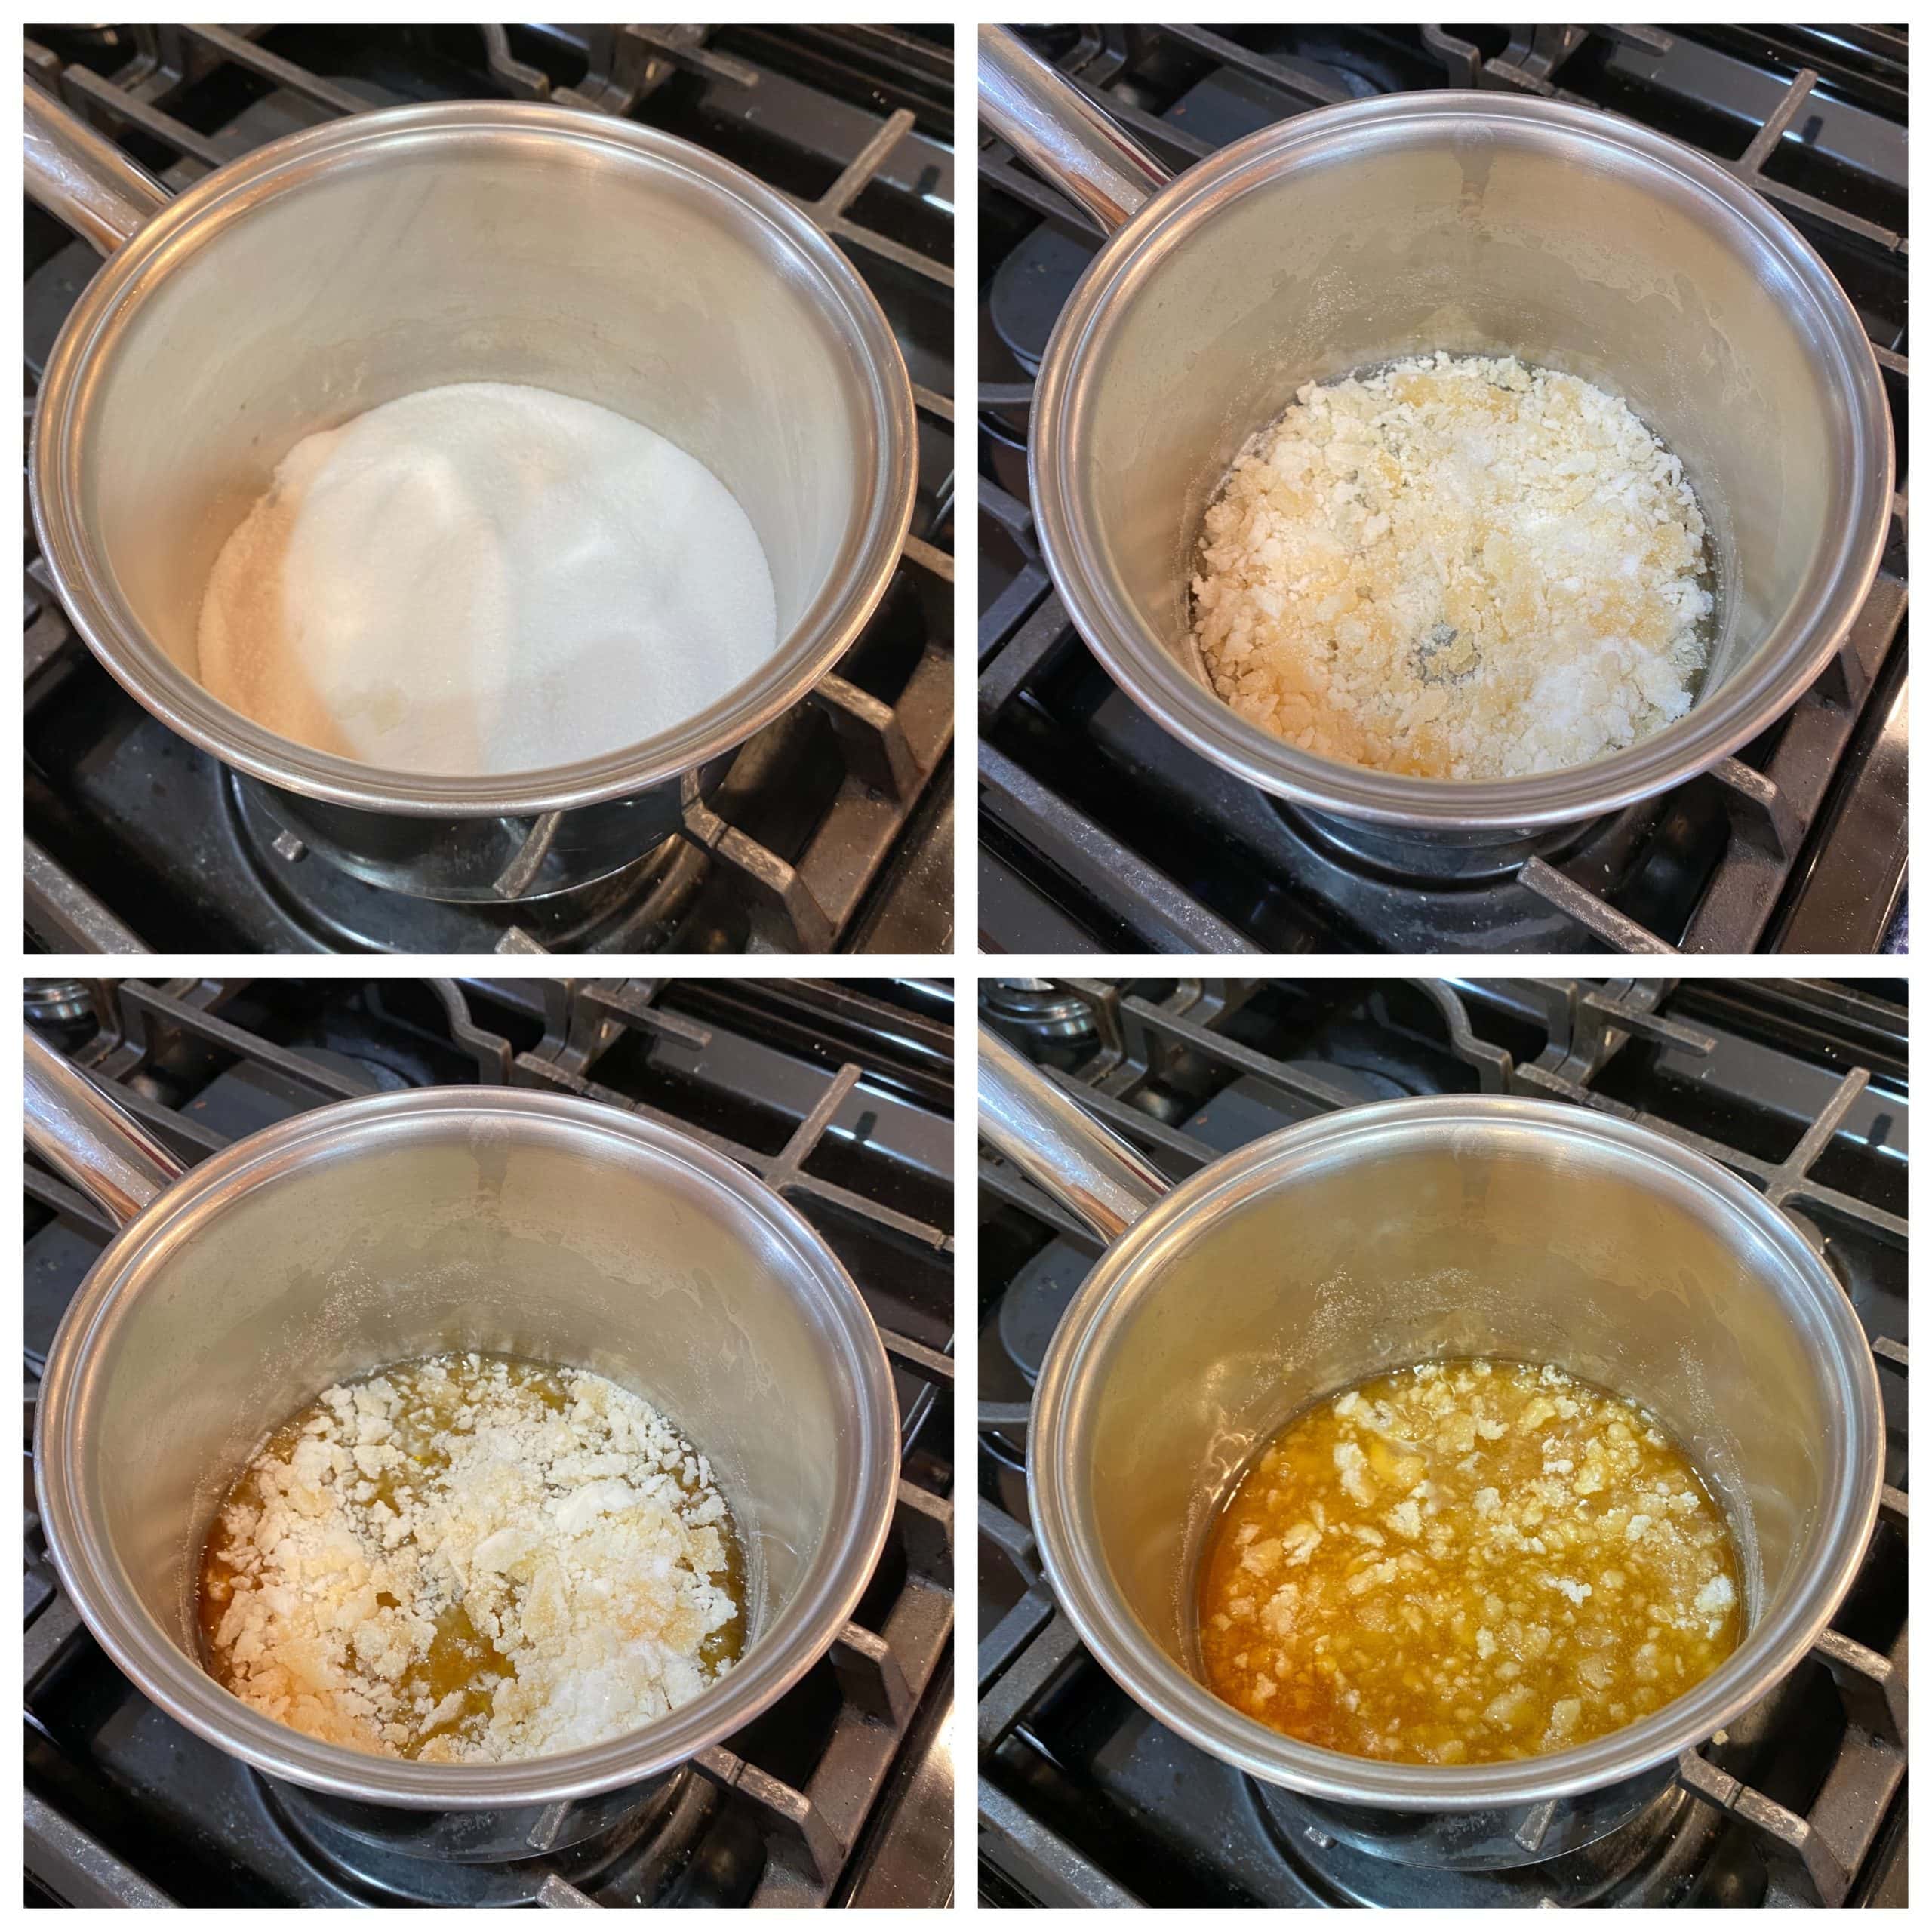
- You’ll start by putting your white sugar and cream of tartar in a small heavy-bottom sauce pan and begin to heat it over medium-low heat.
- At first it will look like nothing is happening because there is no liquid in the pan with the sugar, but trust us, it will melt eventually.
- You don’t want to disturb or stir it very often initially, stir it only occasionally. You’ll notice it will start to clump up at first until it starts to melt. Use a spoon when you do stir the sugar, don’t use a whisk yet until you add the dairy free butter.
- Once it begins to melt, you can stir it a bit more frequently. As it melts it will start to darken as well. Make sure that you’re only at medium-low heat or a little below medium-low heat to prevent scorching.
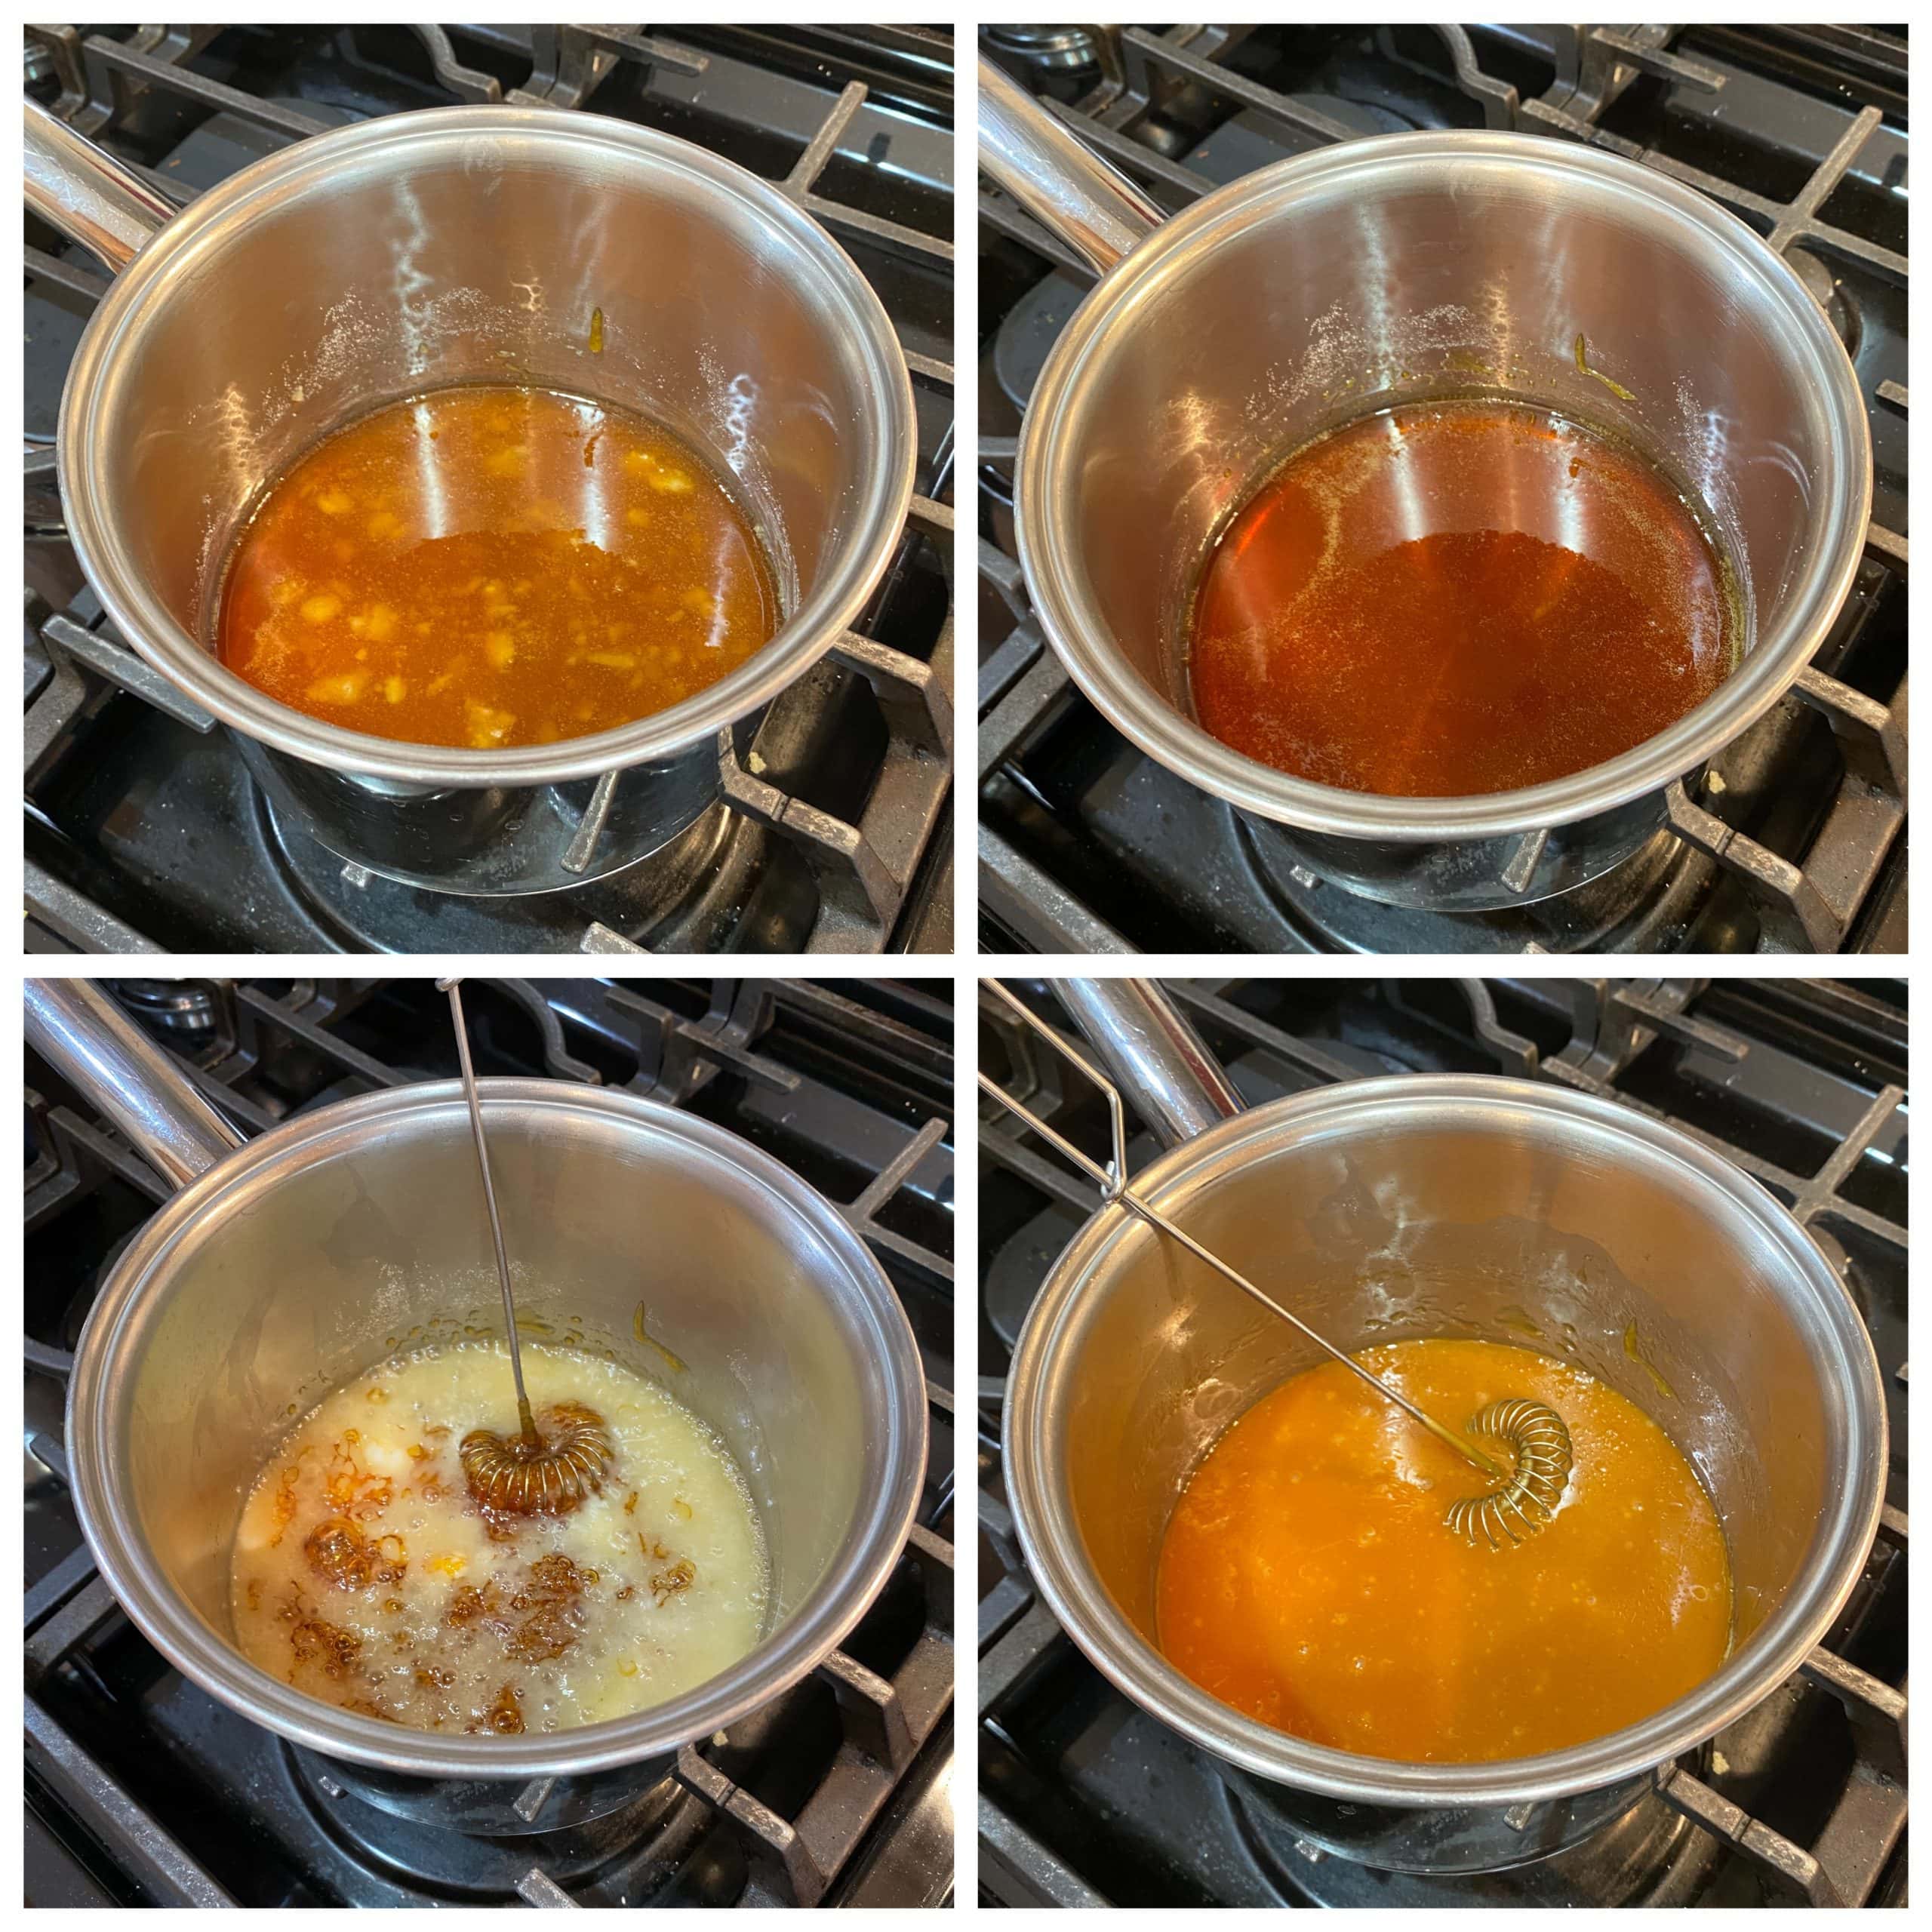
- As soon as the sugar is completely melted, take it off the heat immediately so it doesn’t scorch and have a burnt taste (unless you like that slightly burnt taste, then have at it!).
- You’ll immediately remove it from the heat and stir in the room temperature dairy free butter. It will bubble violently and darken some more once you add the butter and whisk it in, this is normal.
- Whisk in the butter in as best you can. It will look like the butter will not want to mix with the melted sugar at first, but once you add the dairy free half and half it will all come together.
- Once the dairy free butter is mixed in, add a little bit of the dairy free half and half to the pan and whisk some more. Continue adding the half and half a little bit at a time (in 2-3 parts) whisking until it is all mixed together.
- The mixture will bubble violently again and darken some more when you add the dairy free half and half, which is still normal. Whisk in the dash of salt and the vanilla extract.
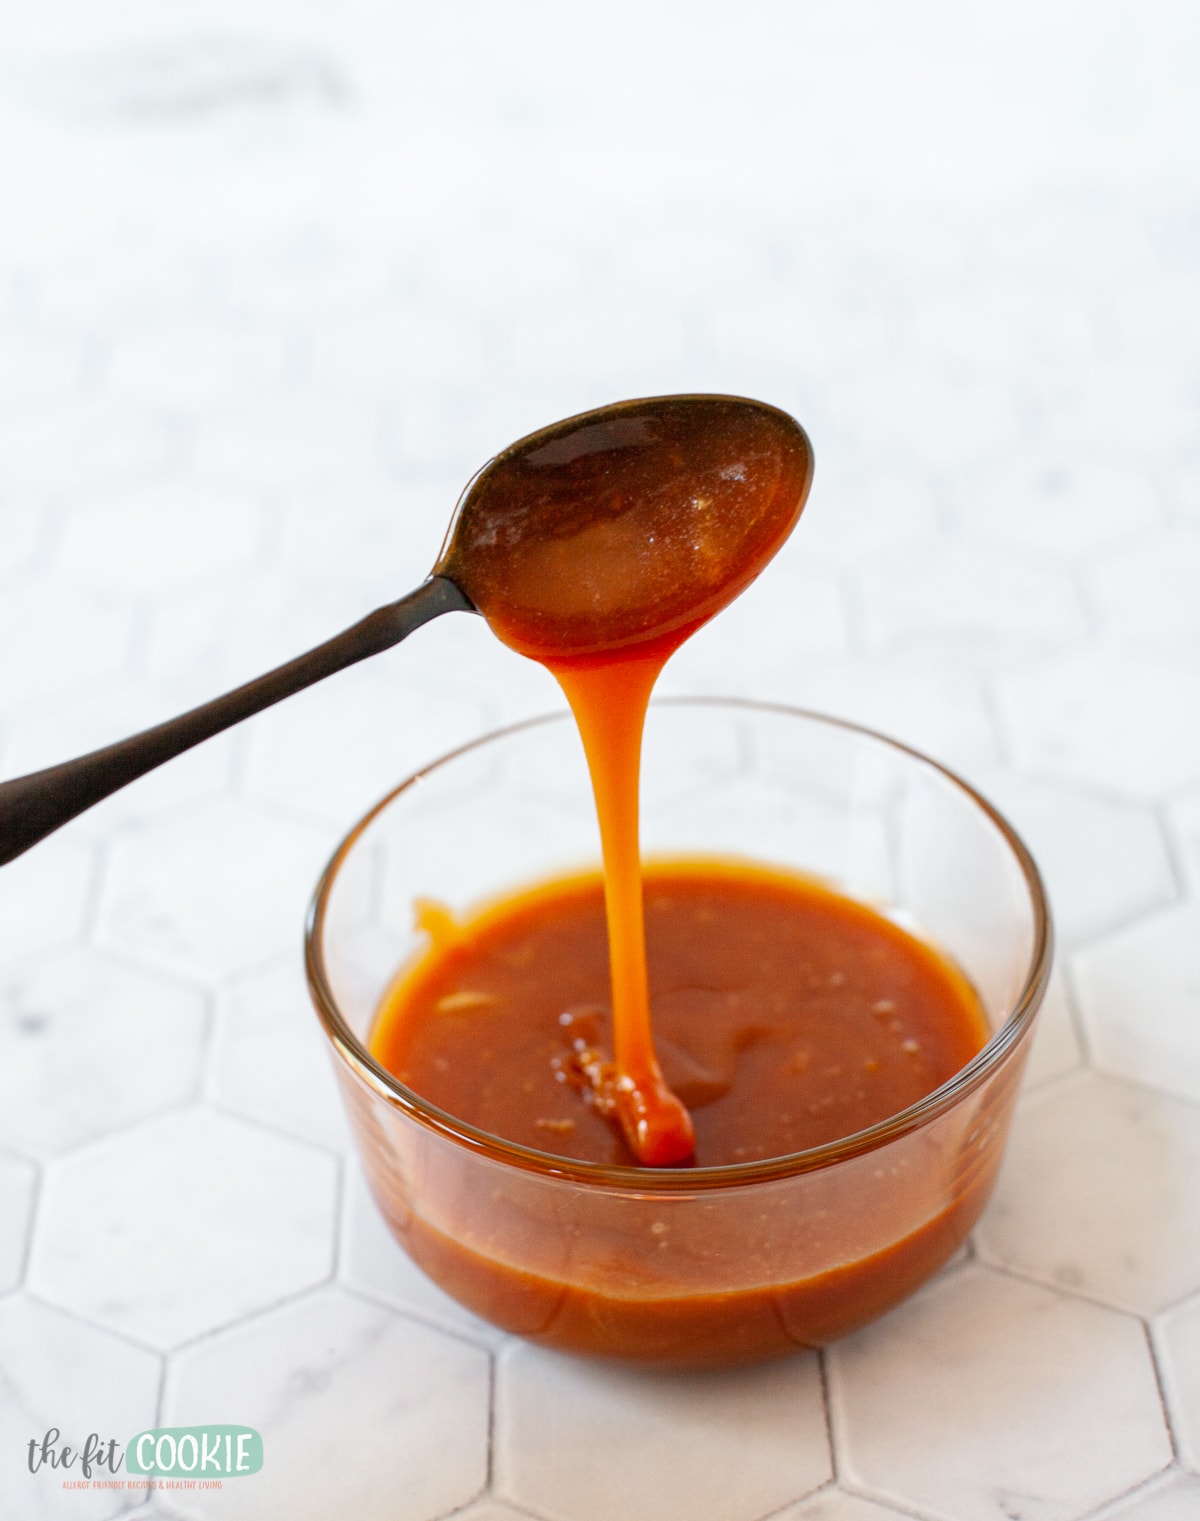
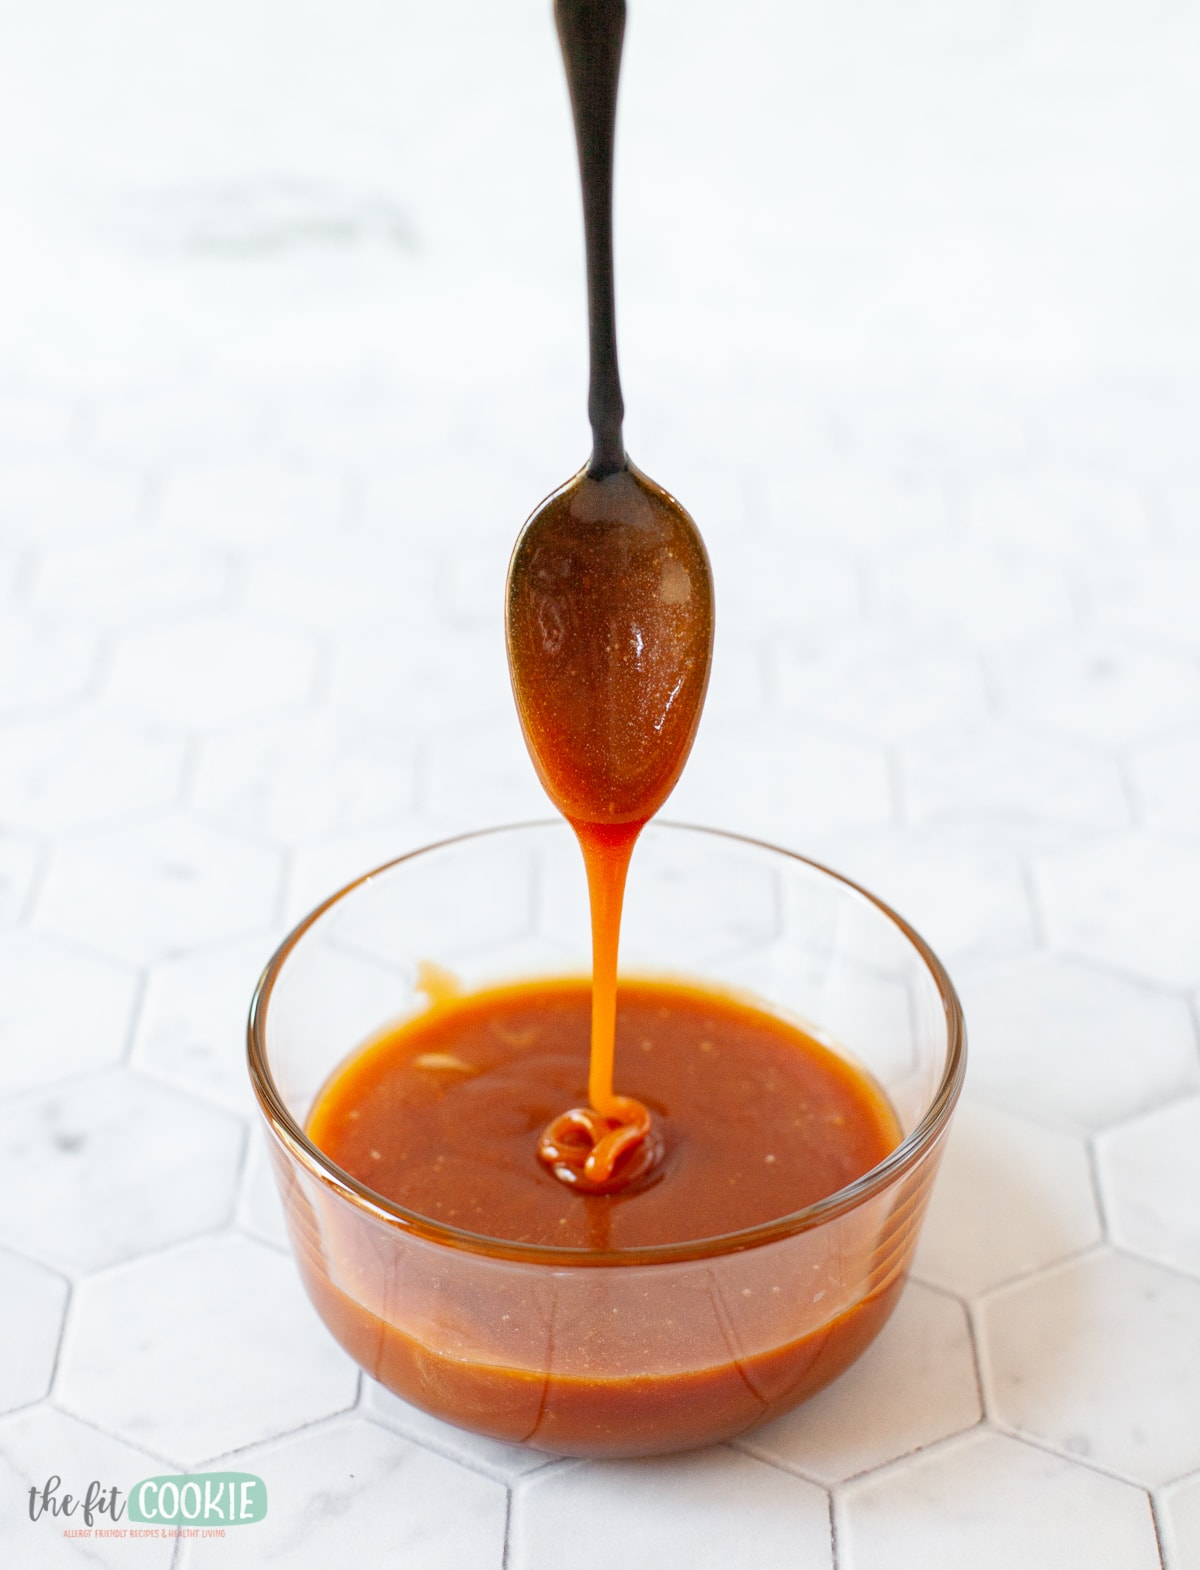
Pour the caramel into a jar or other heat-proof container to cool. The caramel will look pretty runny at first since it’s still hot. Once it’s completely cooled, it will thicken up quite a bit at room temperature, and will thicken up even more in the fridge.
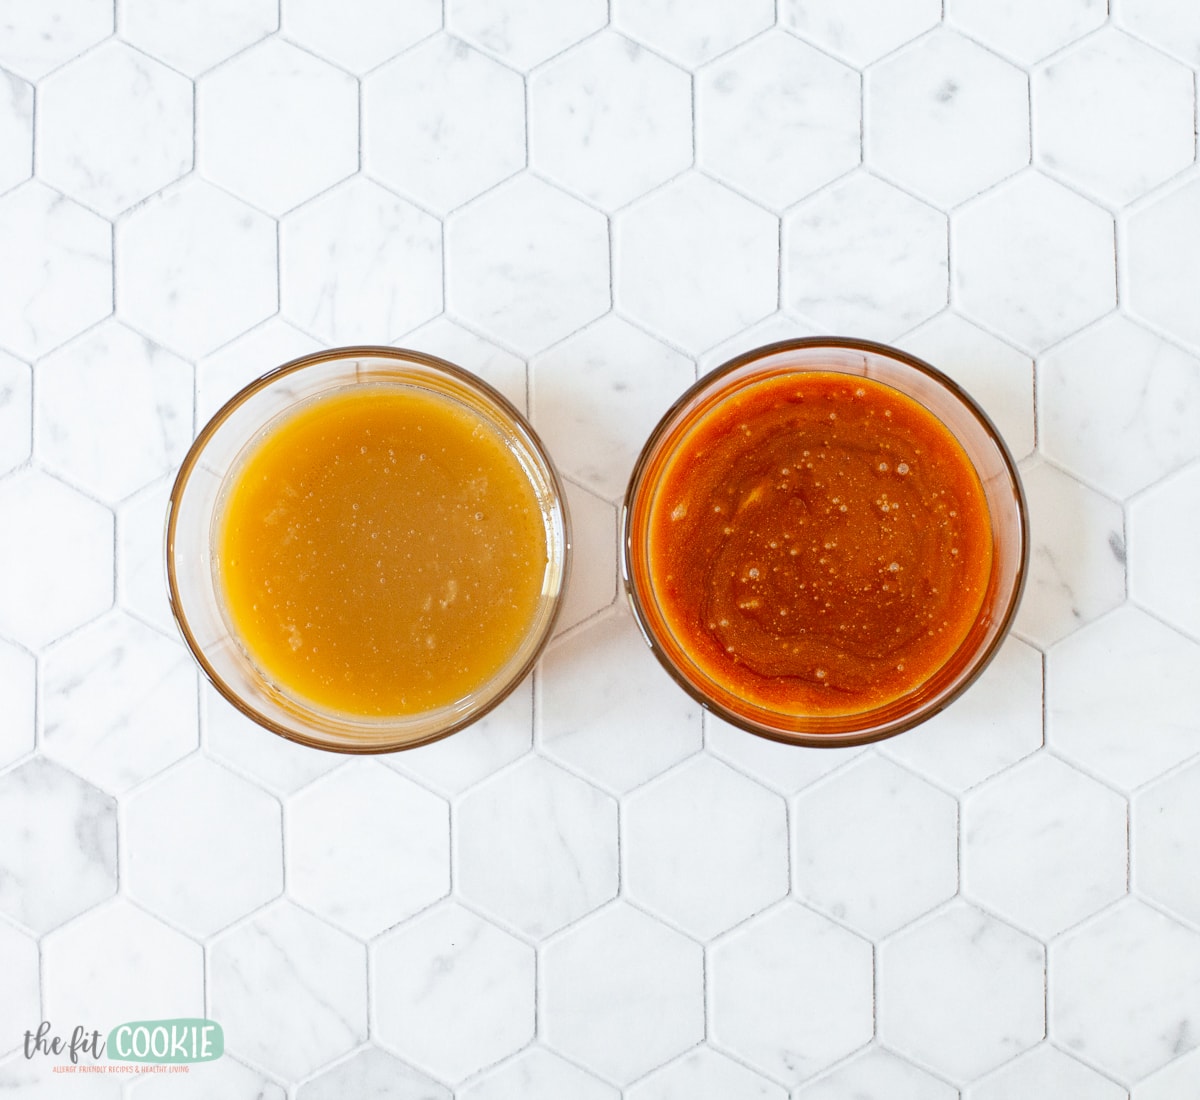
Our dairy free dry caramel tends to look much darker and more red colored than the real dairy counterpart, probably because the heavy cream they use makes the caramel a lighter color than the dairy free half and half we are using.
To clean up your pan, spoons, and whisk, fill the pan with really hot or boiling water and let the utensils soak in the pan. Any hardened sugar from stirring the melting sugar will eventually dissolve.
What dairy free butter should I use in this caramel recipe?
We used the Country Crock Plant Butter Sticks in this recipe with good results but we haven’t tried any other brands of dairy free butter in our caramel recipes.
I used the plant butter sticks because they stay more stable at room temperature than some other brands of dairy free butter (such as the Earth Balance soy free).
Other brands such as Flora plant butter or Miyokos might work well in this recipe, however we haven’t tried them and can’t guarantee the results.
Dry caramel tips:
- Use a spoon to stir the melting sugar, then once the butter is added use a whisk.
- We noticed that this is thicker than easy caramel, so using 3 Tablespoons of half and half makes a good consistency for dipping apples.
- 4-5 Tablespoons of dairy free half and half makes a good thickness for drizzling.
- You can try making this into a butterscotch by using brown sugar, but I haven’t tried this and I think using brown sugar might scorch easier than using white sugar.
Will this caramel sauce freeze well?
Yes! All 3 of of our caramel recipes (the easy method, wet method, and the dry caramel method) can be frozen and thawed with great results.
We tested the freezing and thawing of all of our caramel sauces within a day or 2, so we’re not sure how this caramel sauce will taste after 3-4 months of being in a freezer. But if you have an airtight container, it shouldn’t matter too much.
Before freezing, make sure that your caramel sauce is cooled completely to prevent condensation in the jar or container. And if you are using a glass jar, make sure there is some headspace to allow for expanding caramel as it freezes.
Check out our other caramel recipes!
Traditional Dry Caramel Method for Dairy Free Caramel
Ingredients
- 1 cup white sugar
- ⅛ teaspoon cream of tartar
- 5 Tablespoons Country Crock Plant Butter sticks* room temperature
- ¼ cup Silk dairy free half and half
- dash salt
- 1 teaspoon vanilla extract
Equipment
- Small heavy bottom saucepan
Instructions
- Heat the white sugar and cream of tartar in a small heavy-bottom saucepan over medium-low heat. At first it will look like nothing is happening, but the sugar will begin to melt after a few minutes.
- Stir the sugar only occasionally. You’ll notice it will start to clump up at first until it starts to melt. Use a spoon when you stir the sugar, don’t use a whisk yet. The sugar will start to melt into a liquid after about 5-10 minutes and it will darken as it melts.
- As soon as the sugar is completely melted, take it off the heat immediately so it doesn’t scorch and have a burnt taste (unless you like that slightly burnt taste).
- Immediately whisk in the room temperature dairy free butter. It will bubble violently and darken some more once you add the butter and whisk it in, this is normal.
- Whisk the butter in as best you can. It will look like the butter will not want to mix with the melted sugar at first, but keep whisking until it's mostly mixed in. Once you add the dairy free half and half it will all come together.
- Whisk in half of the dairy free half and half to the pan and whisk to mix. Add the rest of the half and half and mix again. The mixture will bubble again and darken some more each time you add the dairy free half and half, which is normal.
- Whisk in the dash of salt and the vanilla extract.
- Pour the caramel into a jar or other heat-proof container to cool. The caramel will look runny at first, but will thicken as it cools.
- To clean up your pan, spoons, and whisk, fill the pan with really hot or boiling water and let the utensils soak in the pan. Any hardened sugar from stirring the melting sugar will eventually dissolve.
- One it's cooled, store in the fridge for up to a 1-2 weeks or freeze for 3-4 months.
Notes
Nutrition

Sarah Jane Parker is the founder, recipe creator, and photographer behind The Fit Cookie which she founded in 2011. Sarah is based in Wyoming and has been managing food allergies for herself and her 2 children for over 20 years. Sarah was also a certified personal trainer for 12 years, as well as a group fitness instructor, health coach, running coach, and fitness nutrition specialist.